The United States is home to one of the most diverse and comprehensive higher-education systems in the world, attracting millions of students from both within the country and abroad. American universities are known for their academic excellence, research output, flexibility in programs, and strong emphasis on innovation.
1. Types of Universities
a. Public Universities
These are state-funded institutions such as the University of California system, University of Michigan, and University of Texas. They generally offer lower tuition for in-state residents and have large student populations.
b. Private Universities
Privately funded institutions include Harvard University, Stanford University, MIT, and Princeton. They are often highly ranked and offer generous financial aid.
c. Community Colleges
These provide two-year associate degrees and technical training. Many students later transfer to four-year universities. Examples include Miami Dade College and Los Angeles City College.
2. Academic Flexibility
One of the strengths of the U.S. system is its flexible curriculum. Students can choose majors, minors, double majors, and even design their own study paths. The first year often includes general education courses across different fields.
3. Research and Innovation
The U.S. leads globally in university-based research. Many breakthroughs in technology, engineering, medicine, and social sciences originate from American institutions. Universities like MIT, Stanford, and UC Berkeley maintain close ties with industry and innovation hubs such as Silicon Valley.
4. Campus Life
Campus life in the U.S. is vibrant, with opportunities in sports, clubs, cultural events, and community service. Universities often have extensive facilities including libraries, labs, sports centers, and student housing.
5. International Students
More than a million international students study in the U.S. each year. They choose the country for its academic reputation, career opportunities, and multicultural environment. Support services, including orientation, language assistance, and career counseling, are widely available.
6. Application Process
Applying to U.S. universities typically involves:
Academic transcripts
English proficiency tests (TOEFL/IELTS)
Standardized tests (varies: SAT, ACT, GRE, GMAT—many now optional)
Letters of recommendation
A personal statement or essay
Financial documents
Conclusion
U.S. universities offer a powerful combination of academic rigor, research opportunities, and a dynamic learning environment. Whether in engineering, business, humanities, health sciences, or the arts, students can find programs that match their interests and career goals.
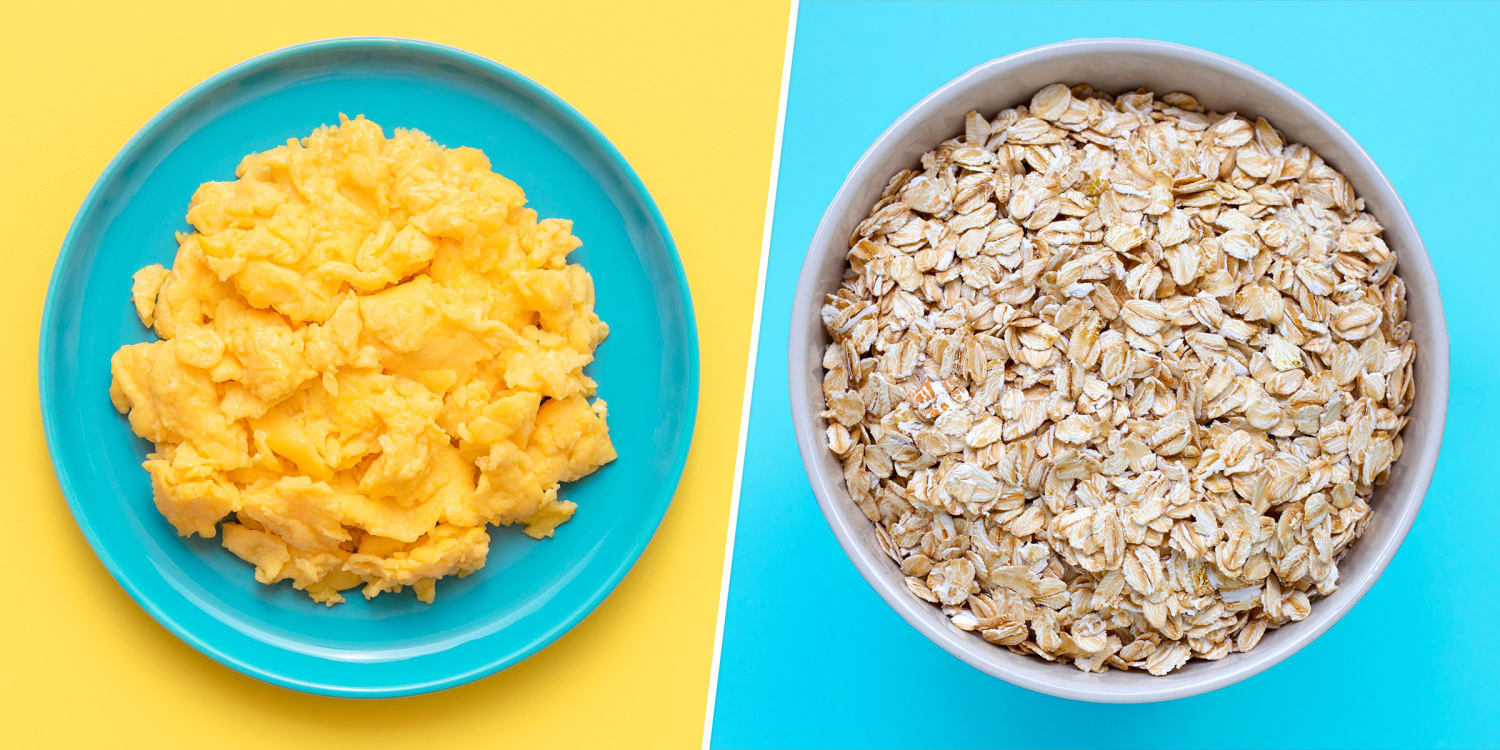
Breakfast is the most important meal of the day. We’ve all heard it. But in our busy lives, it’s often the most rushed. We need something fast. Something healthy. And something delicious. This is where the humble oat steps into the spotlight. Oats are a global breakfast champion for a reason. They are affordable, versatile, and packed with nutrients.
For years, a warm bowl of cooked oatmeal was the standard. But recently, a new contender has taken the breakfast world by storm: overnight oats. This no-cook alternative has become a favorite for its sheer convenience and creamy texture. This leaves many of us standing in our kitchens, wondering which is truly the better choice.
Is the traditional, warm bowl of rolled oats superior? Or does the modern, chilled jar of overnight oats have the edge?
Welcome to FastFlavorz, your home for quick and delicious meal ideas. In this ultimate guide, we will break down everything you need to know about rolled oats vs. overnight oats. We will explore their nutritional differences, health benefits, and impact on your lifestyle. By the end, you’ll know exactly which option is the perfect fit for your health goals and your morning routine. Let’s settle this breakfast debate once and for all.
Understanding the Basics: What Exactly Are Rolled Oats?
Before we can compare the two methods, we must understand our core ingredient. What are rolled oats? Many people see them in the canister and don’t think twice about their origin. But their journey from the field to your bowl is what makes them so special.
Rolled oats are also known as old-fashioned oats. They are a type of lightly processed whole-grain oat. They start their life as whole oat groats. These are the intact kernels of the oat plant after the inedible hull has been removed.
From Groat to Flake: The Journey of a Rolled Oat
To become the familiar flat flakes we buy, oat groats go through a simple two-step process.
Steaming: The groats are first steamed. This process does a few important things. It partially cooks them, which makes them quicker for you to prepare at home. It also stabilizes the healthy oils within the oats, which prevents them from going rancid and extends their shelf life.
Rolling: After steaming, the soft and pliable groats are passed through large rollers. These rollers press them into the flat, oval-shaped flakes we recognize as rolled oats.
This process is key. It creates a larger surface area compared to a whole oat groat. This is why rolled oats cook much faster than their less-processed cousins, like steel-cut oats. Yet, they retain their shape and a pleasant, chewy texture when cooked.
The Classic Preparation: How to Cook Rolled Oats
Cooking traditional rolled oats is a simple and comforting ritual for many. The process is quick, usually taking between 5 to 10 minutes.
Stovetop Method (for a creamier texture):
Combine 1 part rolled oats with 2 parts liquid (water, milk, or a mix).
Add a pinch of salt to enhance the flavor.
Bring the mixture to a boil.
Reduce the heat and let it simmer for about 5-7 minutes.
Stir occasionally until the oats are soft and have absorbed most of the liquid.
Microwave Method (for speed):
In a microwave-safe bowl, combine 1 part rolled oats with 2 parts liquid.
Microwave on high for 2-3 minutes.
Stir well and let it sit for another minute to thicken.
The result is a warm, hearty, and satisfying breakfast. It serves as a blank canvas, ready for you to customize with your favorite toppings.
The Rise of a Breakfast Star: Introducing Overnight Oats
Now, let’s turn our attention to the trendy challenger. What are overnight oats? It’s important to clarify one thing right away. Overnight oats are not a different type of oat. They are a method of preparing oats. In fact, rolled oats are the most common type of oat used to make them.
So, what is this method? Overnight oats are raw rolled oats that are soaked overnight in a liquid. There is no cooking involved. The soaking process does all the work. As the oats sit in the liquid for several hours, they absorb it. They soften and break down, resulting in a creamy, pudding-like consistency.
This preparation method has exploded in popularity. It’s a favorite among busy professionals, parents, and fitness enthusiasts. The “set it and forget it” nature of overnight oats is its biggest selling point.
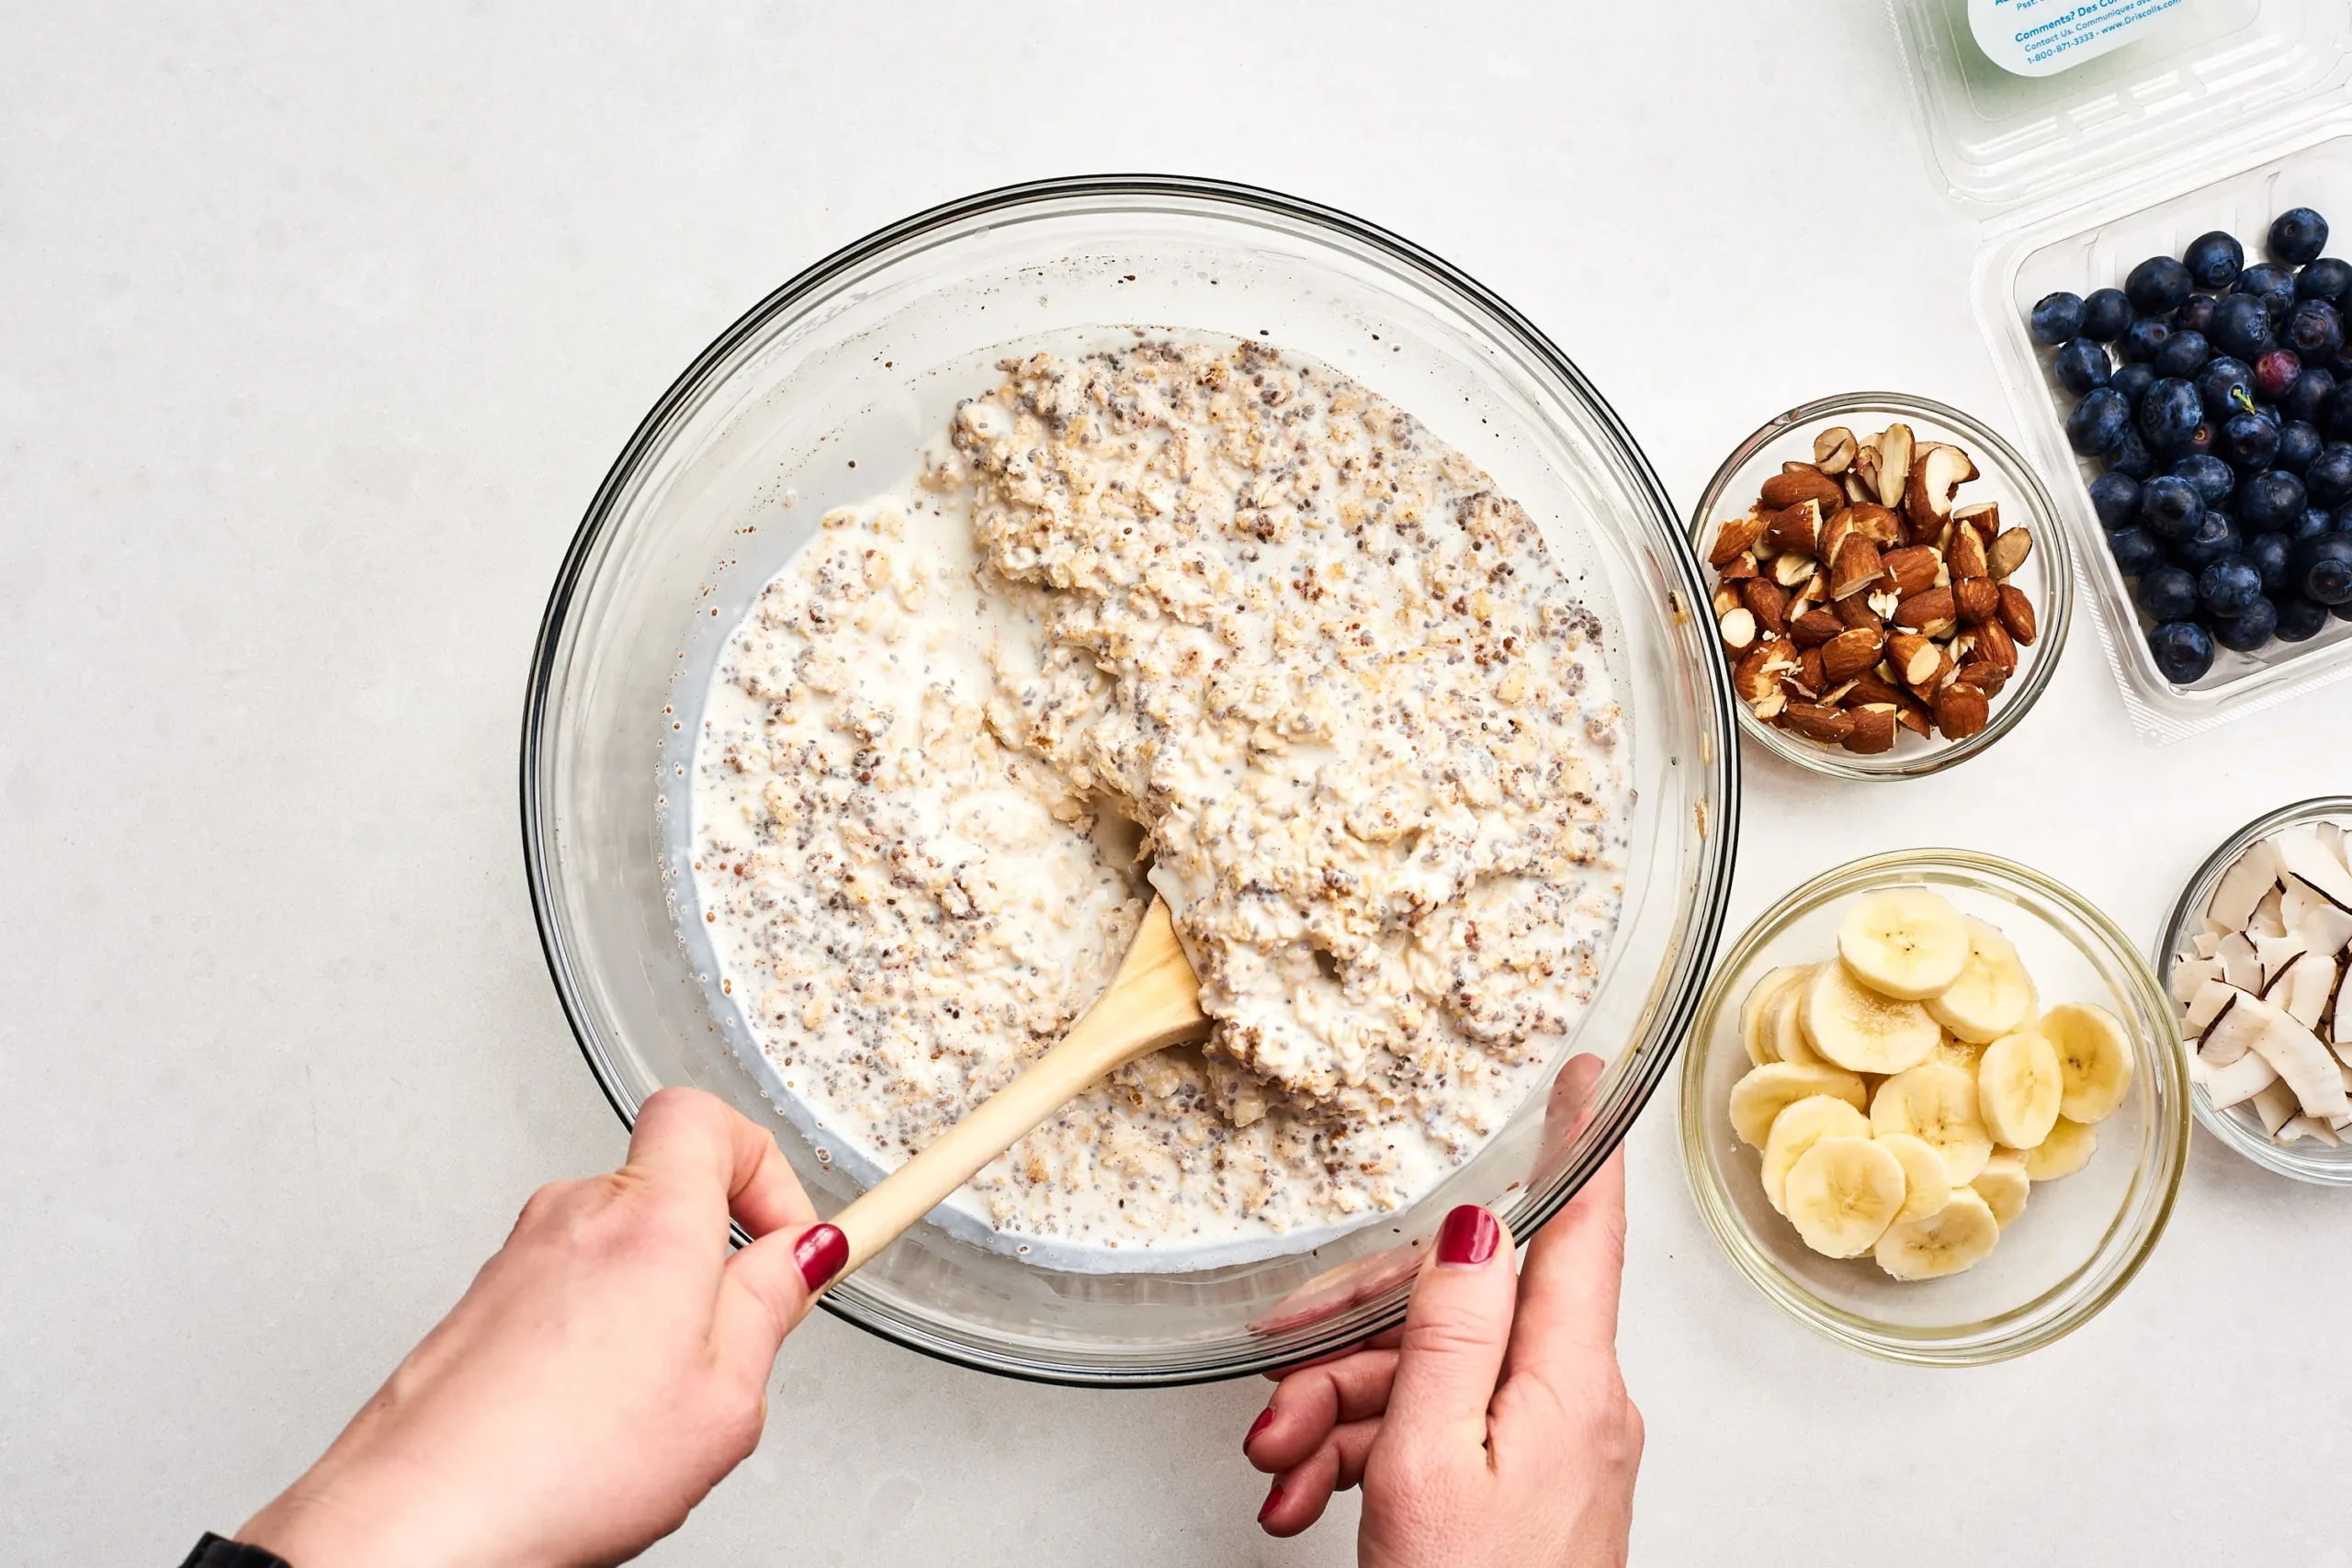
The Simple “No-Cook” Method: How to Make Overnight Oats
Creating overnight oats is incredibly simple. It requires just a few minutes of prep time the night before.
The Basic Formula:
The Container: You’ll need a jar or a container with a lid. A mason jar is a popular choice.
The Base: Combine 1 part rolled oats with 1-2 parts liquid. The exact ratio depends on how thick you like your oats. Common liquids include dairy milk, almond milk, oat milk, coconut milk, or even yogurt.
The Mix-ins: This is where the fun begins. You can add chia seeds (for extra thickness and omega-3s), a sweetener like maple syrup or honey, and spices like cinnamon or vanilla extract.
The Process: Stir or shake everything together until well combined.
The Soak: Secure the lid and place the container in the refrigerator overnight, or for at least 4-6 hours.
In the morning, your breakfast is ready to go. You can eat it straight from the jar or pour it into a bowl. Just give it a quick stir and add your favorite fresh toppings.
The Ultimate Showdown: Rolled Oats vs. Overnight Oats
Now that we understand what they are and how they are made, it’s time for the head-to-head comparison. We will analyze them based on nutrition, digestion, convenience, and taste.
Nutritional Profile: Is There a Difference?
At their core, the oats are the same. A serving of dry rolled oats contains a fantastic mix of macronutrients and micronutrients. They are an excellent source of complex carbohydrates, fiber (specifically beta-glucan), protein, and essential minerals like manganese, phosphorus, and magnesium.
So, if the starting ingredient is identical, how can there be a nutritional difference? The difference lies in the preparation method.
The Power of Resistant Starch: The most significant nutritional difference comes down to something called resistant starch.
Resistant starch is a type of starch that is not digested in your small intestine. Instead, it passes through to your large intestine, where it acts like a prebiotic. It feeds the good bacteria in your gut.
Cooking oats (like in traditional oatmeal) breaks down these starches, making them easily digestible. However, when you soak oats raw and keep them cool, some of the starches remain “resistant.” Therefore, overnight oats contain higher levels of resistant starch than cooked rolled oats.
“Resistant starch is a fantastic tool for gut health and blood sugar management. The gentle, no-heat preparation of overnight oats helps preserve this valuable component,” says culinary nutritionist Sarah Jenkins.
Benefits of resistant starch include:
Improved gut health by feeding beneficial gut flora.
Increased feelings of fullness (satiety), which can aid in weight management.
Better blood sugar control, as it doesn’t cause a rapid spike in glucose.
Winner for Nutrition: Overnight Oats (due to higher resistant starch content).
Digestion and Gut Health
Beyond resistant starch, another factor to consider is phytic acid. Oats, like all grains, seeds, and nuts, contain phytic acid. This compound can bind to minerals like iron, zinc, and calcium in your gut, potentially reducing their absorption. This is why phytic acid is sometimes called an “anti-nutrient.”
The good news is that both preparation methods help reduce phytic acid.
Soaking (Overnight Oats): Soaking grains for several hours helps to activate enzymes that break down phytic acid. This improves your body’s ability to absorb the valuable minerals in the oats.
Cooking (Rolled Oats): The heat from cooking also effectively reduces the phytic acid content.
Both methods are great for making the nutrients in oats more bioavailable. The long soaking time for overnight oats may give it a slight edge in phytic acid reduction, but the difference is likely minimal for most people.
Winner for Digestion: A Tie. Both methods are effective at making oats easier to digest and their minerals more accessible.
Time and Convenience
This is where a clear winner begins to emerge, depending on your lifestyle.
Rolled Oats (Cooked): This method requires active time in the morning. You need to stand by the stove or microwave, stir, and wait for it to cook. This process takes about 5-10 minutes from start to finish. You also have a pot and a bowl to wash.
Overnight Oats: This method shifts the time commitment. It requires 2-5 minutes of prep the night before. In the morning, there is zero active time. You simply grab the jar from the fridge, and breakfast is served. It’s the ultimate grab-and-go meal.
For anyone with a hectic morning schedule, the convenience of overnight oats is undeniable.
Winner for Convenience: Overnight Oats.
Texture and Taste
This category is entirely subjective. It comes down to personal preference.
Rolled Oats (Cooked): When cooked, rolled oats become soft, creamy, and have a slightly chewy bite. They are served warm, making them a comforting and cozy meal, especially on a cold day. The flavor is mild and nutty.
Overnight Oats: The texture of overnight oats is very different. They are dense, thick, and ultra-creamy, much like a pudding or a thick yogurt. They are served cold, which can be incredibly refreshing, particularly in warmer weather or after a workout.
Do you crave a warm, comforting bowl of goodness? Or do you prefer a cool, creamy, and refreshing meal? Your answer will determine your personal winner here.
Winner for Texture and Taste: Personal Preference.
Versatility and Customization
Both versions of oatmeal are incredibly versatile. They are blank canvases for a world of flavor combinations.
Toppings for Cooked Rolled Oats: You can stir in brown sugar, maple syrup, fruits like bananas or berries, and spices while it cooks. Toppings like nuts, seeds, and fresh fruit are typically added just before serving.
Mix-ins for Overnight Oats: This is where overnight oats truly shine. You can layer ingredients in the jar for a beautiful parfait effect. You can mix in protein powder, cocoa powder, fruit purees, and nut butters. The flavors meld together overnight, creating a more integrated taste experience.
While both are customizable, the ability to infuse flavors overnight gives a slight creative edge to the soaked version.
Winner for Versatility: A very slight edge to Overnight Oats.
Comparison Table: At a Glance
Feature
Rolled Oats (Cooked)
Overnight Oats
Preparation Time
5-10 minutes in the morning
2-5 minutes the night before
Cooking Method
Heat (stovetop or microwave)
No-cook (soaking)
Texture
Warm, soft, slightly chewy
Cold, creamy, dense, pudding-like
Serving Temperature
Hot / Warm
Cold / Chilled
Resistant Starch
Lower content
Higher content
Phytic Acid
Reduced by heat
Reduced by soaking
Best For
Cozy mornings, comfort food
Busy schedules, grab-and-go
Which Oat Fits Your Lifestyle?
The “better” option isn’t just about nutrition; it’s about what works for you. Let’s look at some common lifestyle goals and see which oat comes out on top.
For Weight Management and Satiety
Both are excellent choices for weight management. The high fiber content, particularly beta-glucan, in all oats helps you feel full and satisfied. This reduces the chances of overeating later in the day.
However, the higher resistant starch content in overnight oats gives them an advantage. Resistant starch promotes satiety, meaning it helps you feel fuller for longer. This can be a powerful tool in managing your appetite and overall calorie intake.
Pro-Tip: Regardless of which you choose, be mindful of your toppings. Loading your oats with excessive sugar, chocolate, or high-fat creams can easily turn a healthy meal into a calorie bomb. Stick to fresh fruits, nuts, seeds, and spices.
For the Busy Professional or Parent
For anyone juggling a demanding job, getting kids ready for school, or simply trying to maximize sleep, the morning is a race against the clock. In this scenario, overnight oats are the undisputed champion.
Having a nutritious, delicious breakfast waiting for you in the fridge is a complete game-changer. It eliminates the need to cook, make decisions, or clean up pots and pans during the morning rush. It’s the definition of a fast and flavorful breakfast, which is what we are all about here at FastFlavorz (https://freeblitz.shop/).
For Athletes and Pre/Post Workout Fuel
Oats are a favorite fuel source for athletes due to their slow-releasing complex carbs.
Pre-Workout: A warm bowl of cooked rolled oats about 60-90 minutes before a workout can provide sustained energy. It’s gentle on the stomach and provides the fuel needed for performance.
Post-Workout: This is where overnight oats can be fantastic. They are cool and refreshing after a tough session. They are also easily digestible, helping to replenish glycogen stores quickly. You can also easily mix in a scoop of protein powder to aid in muscle repair and recovery.
The choice here depends on timing and personal preference.
For Comfort and a Cozy Start
There are some days when all you want is a warm hug in a bowl. On cold, rainy mornings, or when you’re feeling a bit under the weather, nothing beats a warm, steaming bowl of cooked rolled oats.
The warmth is soothing, and the classic preparation feels nostalgic and comforting. While overnight oats are convenient, they can’t replicate the cozy experience of traditional oatmeal.
Get Started with FastFlavorz-Approved Recipes
Ready to try them for yourself? Here are two simple, foundational recipes to get you started.
Classic Comfort Rolled Oats Recipe
This is the perfect recipe for a slow weekend morning.
Ingredients:
1/2 cup rolled oats
1 cup milk or water
Pinch of salt
1/2 teaspoon cinnamon
1 tablespoon maple syrup
Toppings: Sliced banana, walnuts, and a drizzle of honey.
Instructions:
In a small saucepan, combine the oats, milk, salt, and cinnamon.
Bring to a simmer over medium heat.
Cook for 5-7 minutes, stirring often, until creamy.
Stir in the maple syrup.
Pour into a bowl and top with banana slices, walnuts, and a final drizzle of honey.
Basic Grab-and-Go Overnight Oats Recipe
Prep this the night before a busy day for a stress-free morning.
Ingredients:
1/2 cup rolled oats
1/2 cup almond milk (or your choice of milk)
1/4 cup Greek yogurt (for extra creaminess and protein)
1 tablespoon chia seeds
1 tablespoon honey or maple syrup
1/2 teaspoon vanilla extract
Toppings: Fresh berries and slivered almonds.
Instructions:
In a jar or container with a lid, add the rolled oats, almond milk, Greek yogurt, chia seeds, honey, and vanilla.
Stir very well or put the lid on and shake until everything is combined.
Ensure all the oats are submerged in the liquid.
Secure the lid and refrigerate for at least 6 hours, or overnight.
In the morning, give it a stir, top with fresh berries and almonds, and enjoy!
The Verdict: So, Which One is Truly Better?
After breaking it all down, the answer to the “Rolled Oats vs. Overnight Oats” debate is clear: there is no single “better” option.
The best choice is the one that aligns with your personal preferences, health goals, and daily schedule.
Choose Overnight Oats if:
Your mornings are extremely busy.
You prioritize convenience and grab-and-go meals.
You want to maximize resistant starch for gut health and satiety.
You enjoy a cold, creamy, pudding-like texture.
Choose Cooked Rolled Oats if:
You have a few minutes to cook in the morning.
You crave a warm, comforting, and hearty breakfast.
You prefer a softer, chewier texture.
You want a cozy meal on a cold day.
The fantastic news is that both are incredibly healthy choices. You can’t go wrong with either. Why not incorporate both into your weekly routine? Enjoy warm, cooked oats on lazy weekends and rely on pre-made overnight oats for your busy weekdays. This way, you get the best of both worlds.
Quick Answers to Your Oat Questions
Here are some frequently asked questions about oats.
1. Can I use instant oats for overnight oats? It’s not recommended. Instant oats are thinner and more processed. They will turn into a very mushy and paste-like texture when soaked overnight. Rolled oats provide the best creamy yet substantial texture.
2. Can I heat my overnight oats? Yes, you can. You can gently warm them in the microwave for 30-60 seconds. However, be aware that heating them will reduce the amount of beneficial resistant starch.
3. How long do overnight oats last in the fridge? Overnight oats can be stored in an airtight container in the refrigerator for up to 5 days. However, they are at their best quality and texture within the first 2-3 days.
4. Are oats naturally gluten-free? Pure oats are naturally gluten-free. The issue is cross-contamination. They are often grown and processed in facilities that also handle wheat, barley, and rye. If you have celiac disease or a gluten sensitivity, be sure to buy oats that are certified gluten-free.
5. Which is better for people with diabetes? Both are excellent low-glycemic index foods. However, the higher resistant starch in overnight oats may offer a slight advantage for blood sugar control. As always, it is best to consult with a doctor or registered dietitian for personalized advice.
Mornings can be chaotic. The alarm buzzes too early. You rush to get ready. Making a healthy breakfast often feels impossible. Many of us grab a sugary cereal or a plain piece of toast. But what if you could wake up to a delicious, nutritious, and ready-to-eat breakfast every single day?
Welcome to the world of overnight oats. This simple meal prep hack is a game-changer. It requires just a few minutes of effort the night before. The result is a creamy, flavorful, and incredibly satisfying breakfast waiting for you in the fridge.
Here at FastFlavorz, we believe good food should be easy and exciting. This guide is designed for complete beginners. We will walk you through every single step. You will learn the science, the secrets, and the simple joy of making perfect overnight oats. Get ready to transform your mornings forever.
What Exactly Are Overnight Oats?
You might be wondering what makes overnight oats different from regular oatmeal. The answer is simple: there is no cooking involved.
Overnight oats are a no-cook method of making oatmeal. Instead of heating oats on the stove or in the microwave, you soak them. Raw oats are mixed with a liquid, like milk or yogurt. This mixture is then left to rest in the refrigerator overnight.
As the oats soak, they absorb the liquid. This softens them until they are tender and creamy. They develop a texture similar to a thick pudding or a chilled porridge. The process is pure magic. It’s a simple chemical reaction that does all the work for you while you sleep. This method not only saves you time but also creates a unique and delightful breakfast experience.
The Undeniable Benefits of Making Overnight Oats
Switching to overnight oats is more than just a convenience. It comes with a host of benefits that can improve your health, your schedule, and your wallet.
A Major Time-Saver
This is the most celebrated benefit. Imagine waking up and your breakfast is already made. No pots to watch. No microwaves to clean. You simply grab a jar from the fridge, add your favorite toppings, and enjoy. The five minutes of prep time at night saves you at least 15 to 20 minutes of stress in the morning.
Packed with Nutrients
Oats are a nutritional powerhouse. They are loaded with a type of soluble fiber called beta-glucan. This fiber is famous for helping to lower cholesterol and keep you feeling full for hours. This means no more mid-morning snack attacks. Soaking oats may also make their nutrients easier for your body to absorb.
Improved Digestion
The soaking process helps break down phytic acid. Phytic acid is a natural compound found in grains that can interfere with the absorption of minerals like zinc and iron. By soaking the oats, you reduce the phytic acid. This makes the oats easier to digest and helps your body get more of the good stuff.
“To eat is a necessity, but to eat intelligently is an art.” – François de La Rochefoucauld
Highly Customizable
Overnight oats are a blank canvas. You can tailor them to your exact preferences. Do you love fruity flavors? Add berries. Are you a chocoholic? Mix in some cocoa powder. The possibilities are endless. You can create a different flavor for every day of the week, ensuring you never get bored with your breakfast.
Budget-Friendly
A large container of rolled oats is one of the most affordable items in the grocery store. Compared to expensive cereals, breakfast bars, or daily coffee shop runs, a jar of homemade overnight oats costs just pennies. It is a smart and delicious way to manage your food budget.
The Core Components: Building Your Perfect Jar
Creating delicious overnight oats is like being a food scientist in your own kitchen. It starts with understanding the key ingredients. Each one plays a vital role in the final texture and taste.
The Oats: Choosing Your Base
The type of oat you choose is the most important decision. It directly impacts the final texture of your breakfast.
Oat Type
Description
Best For Overnight Oats?
Rolled Oats
Also called old-fashioned oats. These are whole oats that have been steamed and flattened.
Yes, the best choice. They create a creamy, chewy texture without becoming too mushy.
Quick Oats
These are rolled oats that have been cut into smaller pieces and rolled thinner.
An acceptable alternative. They absorb liquid faster, resulting in a softer, mushier texture.
Steel-Cut Oats
These are whole oat groats that have been chopped into two or three pieces.
Not recommended for the basic recipe. They remain very chewy and need a much longer soaking time or more liquid.
For beginners, we strongly recommend starting with rolled oats. They provide the perfect balance and are very forgiving.
The Liquid: Your Soaking Medium
The liquid you choose will hydrate the oats and add flavor. You have many options here, so feel free to experiment.
Dairy Milk: Whole, 2%, or skim milk all work well for a classic, creamy taste.
Almond Milk: A popular choice for a nutty, slightly sweet flavor. It’s also low in calories.
Soy Milk: Provides a creamy texture and a boost of plant-based protein.
Oat Milk: Creates an incredibly creamy and rich result. It enhances the natural oat flavor.
Coconut Milk: Gives your oats a tropical, rich, and decadent feel.
Greek Yogurt: You can add a scoop of this for extra creaminess and a significant protein boost.
Water: While you can use water, it will result in a much blander flavor. It’s best to use it in combination with another liquid.
The “Magic” Ingredient: Chia Seeds
Chia seeds are tiny, but they are incredibly powerful. Adding just one tablespoon to your oats can transform the texture.
When mixed with liquid, chia seeds form a gel. This gel helps to thicken the overnight oats, giving them a rich, pudding-like consistency. They also add a serious nutritional punch. Chia seeds are packed with omega-3 fatty acids, fiber, and protein. While they are optional, we highly recommend them for the best texture.
The Sweetener: A Touch of Sweetness
Plain oats can be a bit bland. A small amount of sweetener brings all the flavors to life. Natural sweeteners are a great choice.
Maple Syrup: Adds a classic, warm sweetness.
Honey: A natural and delicious option (do not give to infants under one year old).
Agave Nectar: A plant-based sweetener that mixes in easily.
Mashed Banana: A fantastic way to sweeten your oats naturally while also adding flavor and creaminess.
Stevia or Monk Fruit: Great options if you are looking for a sugar-free alternative.
The Golden Ratio: The Secret to Perfect Texture
The biggest fear for beginners is ending up with oats that are either soupy or cement-thick. The key to avoiding this is understanding the “golden ratio” of oats to liquid. This ratio is your starting point for perfect texture every time.
The most basic and reliable ratio is 1 part oats to 1 part liquid.
For example:
1/2 cup rolled oats
1/2 cup milk
This creates a standard, thick texture that most people enjoy. However, you can easily adjust it to your liking.
Desired Texture
Recommended Ratio (Oats:Liquid)
Example (with 1/2 cup oats)
Standard & Thick
1 : 1
1/2 cup oats + 1/2 cup liquid
Thinner & More Creamy
1 : 1.5
1/2 cup oats + 3/4 cup liquid
With Chia Seeds
1 : 1.5
1/2 cup oats + 1 Tbsp chia + 3/4 cup liquid
Remember, chia seeds and protein powder will absorb extra liquid. If you add them, you will almost always need to add a little extra milk or water to compensate.
The Master Recipe: Your First Jar of Overnight Oats (Step-by-Step)
Now it’s time to put it all together. This is our foolproof master recipe. It’s simple, quick, and will give you a delicious foundation to build upon.
Ingredients You’ll Need
1/2 cup rolled oats
1/2 cup milk of your choice
1 tablespoon chia seeds (optional, but recommended)
1 tablespoon maple syrup or honey (or to taste)
1/4 teaspoon vanilla extract (optional, for flavor)
Equipment You’ll Need
A glass jar with a lid (a 16 oz or 500 ml Mason jar is perfect)
Measuring cups and spoons
A spoon for mixing
Step 1: Combine Dry Ingredients
In your jar, add the rolled oats and chia seeds. Give the jar a little shake to mix them together. This helps ensure the chia seeds are evenly distributed and won’t clump together.
Step 2: Add Wet Ingredients
Pour in your milk, maple syrup, and vanilla extract. Don’t worry about stirring just yet. Simply add everything on top of the dry ingredients.
Step 3: Mix, Mix, Mix!
This is a crucial step. Use your spoon to stir everything together very well. Scrape the bottom of the jar to make sure there are no dry pockets of oats left. The mixture should be fully combined and look like a thick, soupy liquid.
Step 4: Seal and Refrigerate
Screw the lid onto your jar securely. Place the jar in the refrigerator. Let it sit for at least 4 hours, but for the best results, leave it overnight (around 8 hours). This gives the oats and chia seeds ample time to absorb the liquid and soften.
Step 5: The Morning After – Stir and Garnish
The next morning, open your jar. The mixture will be thick and creamy. Give it a good stir. Some of the liquid may have settled, and stirring will recombine everything into a perfect consistency.
Now for the fun part: toppings! Add fresh fruit, nuts, seeds, or a dollop of yogurt. Then, grab a spoon and enjoy your amazing homemade breakfast.
“A healthy breakfast is a promise to yourself that today will be a good day.” – Unknown
Beyond the Basics: 5 Delicious Flavor Variations to Try
Once you have mastered the basic recipe, it’s time to get creative. The flavor combinations are truly limitless. Here are five delicious and popular variations to inspire you. Simply add these ingredients during Step 2 of the master recipe.
1. Apple Cinnamon Pie
This flavor tastes like a comforting dessert for breakfast.
Add-ins: 1/4 cup unsweetened applesauce, 1/2 teaspoon cinnamon, a pinch of nutmeg.
Morning Toppings: Diced fresh apple, chopped pecans or walnuts.
2. Peanut Butter Cup
For the chocolate and peanut butter lovers. This is pure indulgence.
Add-ins: 1 tablespoon creamy peanut butter, 1 tablespoon cocoa powder. You might need a splash more milk.
Morning Toppings: Mini chocolate chips, a drizzle of peanut butter.
3. Tropical Mango Coconut
Escape to a tropical island with this bright and sunny combination.
Use: Coconut milk as your liquid.
Add-ins: 1/2 cup diced mango (fresh or frozen).
Morning Toppings: Toasted coconut flakes, more fresh mango.
4. Blueberry Muffin
All the flavor of a fresh blueberry muffin, but packed with nutrients.
Add-ins: 1/2 cup fresh or frozen blueberries, 1/2 teaspoon lemon zest.
Morning Toppings: A handful of fresh blueberries, slivered almonds.
5. Coffee Lover’s Mocha
Get your caffeine and breakfast fix in one delicious jar.
Modify Liquid: Use 1/4 cup cold brew coffee and 1/4 cup milk.
Add-ins: 1 tablespoon cocoa powder.
Morning Toppings: A dollop of yogurt, chocolate shavings.
Pro Tips and Tricks for Overnight Oat Success
After making hundreds of jars of overnight oats, we’ve learned a few things. Here are some pro tips to help you perfect your craft.
Choosing the Right Container
While any container with a lid will work, glass jars are the best. They don’t stain or hold onto odors. They are easy to clean, and the clear glass lets you see your beautiful layered creation. A 16 oz (500 ml) wide-mouth Mason jar is the ideal size.
When to Add Your Toppings
Some ingredients are best mixed in the night before, while others should be added right before eating.
Mix-ins (Night Before): Chia seeds, protein powder, cocoa powder, spices, sweeteners, and hearty fruits like applesauce.
Toppings (In the Morning): Fresh berries (can get mushy), bananas (can brown), nuts and seeds (can get soft), granola, and toasted coconut. Adding these in the morning preserves their texture and freshness.
Meal Prepping for the Week
You can easily prepare 3-5 days of overnight oats at once. Line up your jars and create an assembly line. Add the dry ingredients to all jars, then the wet ingredients. Mix, seal, and store them in the fridge. This sets you up for an entire week of effortless, healthy breakfasts.
Troubleshooting Common Overnight Oat Problems
Even the simplest recipes can have hiccups. If your oats don’t turn out perfect, don’t worry. Here’s a quick guide to fixing common issues.
Problem
Likely Cause(s)
How to Fix It
Oats are too runny or soupy.
Too much liquid was used. Or, you forgot to add chia seeds.
Add a tablespoon of chia seeds, stir, and let it sit for another 30-60 minutes. It will thicken up.
Oats are too thick or pasty.
Not enough liquid was used. Or, you added too much protein powder or chia seeds.
Simply stir in a splash of milk or water until it reaches your desired consistency.
Oats taste bland.
Not enough sweetener or flavorings were used.
Stir in a little more maple syrup, a pinch of salt (it enhances sweetness), or some vanilla extract. Fresh fruit on top also helps!
The texture is mushy.
You used quick oats instead of rolled oats.
This is just a textural preference. If you don’t like it, be sure to use rolled oats next time for a chewier bite.
Storing Your Overnight Oats Safely
Food safety is important. Properly stored overnight oats are a safe and convenient meal.
In the Refrigerator: Your overnight oats will last for up to 5 days in an airtight container in the refrigerator. The texture may soften slightly each day, which some people prefer. If you use fresh, delicate fruit like raspberries, it’s best to eat those jars within 2-3 days.
In the Freezer: Yes, you can freeze overnight oats! Prepare them in freezer-safe jars, making sure to leave some space at the top for expansion. They can be frozen for up to 3 months. To eat, simply transfer a jar to the refrigerator the night before you want to eat it. It will thaw overnight and be ready for you in the morning.
Your New Favorite Breakfast Awaits
You are now fully equipped to make the best overnight oats of your life. This simple, no-cook breakfast is more than just a meal; it’s a form of self-care. It’s a way to give yourself a healthy, delicious start, even on the busiest of days.
Start with the master recipe. Get comfortable with the process. Then, let your creativity run wild. Experiment with different milks, fruits, and spices. Find the combinations that make you excited to wake up in the morning.
For more delicious and simple meal ideas, be sure to explore all the recipes we have here at FastFlavorz (https://freeblitz.shop/). Happy soaking!
Frequently Asked Questions (FAQs)
Can I use steel-cut oats for this recipe? You can, but you will need to adjust the recipe. Steel-cut oats require more liquid (a 1:2 ratio of oats to liquid) and a longer soaking time. The texture will be much chewier.
Do I have to use chia seeds? No, chia seeds are optional. However, they are highly recommended as they create a thicker, more pudding-like texture and add significant nutritional value.
How long do overnight oats need to soak? They need a minimum of 4 hours to soften properly. For the best creamy texture, soaking them overnight (about 8 hours) is ideal.
Can I eat overnight oats warm? Absolutely! While they are delicious cold, you can easily heat them. Just pop the jar in the microwave for 60-90 seconds, stirring halfway through.
What is the best jar size for overnight oats? A 16-ounce (500 ml) jar is perfect. It gives you enough room for the oats, liquid, and plenty of space for toppings without overflowing when you stir.
A great cocktail is more than just a drink. It’s a story in a glass. It’s a blend of history, culture, and craftsmanship. Certain cocktails have risen above the rest, becoming timeless icons recognized worldwide. They are the drinks you see in classic films and order at the most sophisticated bars.
These iconic cocktails have endured for a reason. They represent a perfect balance of flavors—sweet, sour, bitter, and strong. From the bold whiskey notes of a Manhattan to the vibrant citrus of a Cosmopolitan, each one offers a unique experience. Understanding them is like learning a new language of flavor.
In this ultimate guide, we will journey through the world of legendary drinks. We will explore their fascinating origins, break down their essential recipes, and share the secrets to making them perfectly at home. Here at FastFlavorz, we believe that everyone can be a great home bartender. Let’s get started.
The Manhattan: A Taste of Timeless Sophistication
The Manhattan is the epitome of a classic cocktail. It’s dark, strong, and unapologetically elegant. Sipping one feels like stepping back into New York’s Gilded Age.
A Sip of History
The most popular origin story places the Manhattan’s creation in the early 1870s at New York City’s Manhattan Club. The drink was supposedly crafted for a banquet hosted by Lady Randolph Churchill, Winston Churchill’s mother. While this story is likely a romantic myth, the cocktail undoubtedly hails from this era of high society. It quickly became a staple for anyone seeking a serious, spirit-forward drink.
The Classic Manhattan Recipe
Making a Manhattan is an exercise in simplicity and precision. The quality of your ingredients will shine through.
Ingredient
Amount
Notes
Rye Whiskey
2 oz (60 ml)
Provides a spicy backbone. Bourbon can be used for a sweeter profile.
Sweet Vermouth
1 oz (30 ml)
Choose a quality brand like Carpano Antica or Cocchi di Torino.
Angostura Bitters
2 dashes
The essential “spice” of the cocktail.
Garnish
Brandied Cherry
A high-quality cherry is non-negotiable. Avoid bright red maraschinos.
Instructions:
Fill a mixing glass with ice.
Add the rye whiskey, sweet vermouth, and Angostura bitters.
Stir the mixture with a bar spoon for about 20-30 seconds. The goal is to chill and dilute without creating ice shards.
Strain the cocktail into a chilled coupe or martini glass.
Garnish with a single brandied cherry.
Glassware and Technique: The Stirred vs. Shaken Debate
“Stir drinks that are all spirits. Shake drinks that have juice, cream, or eggs.” – An Old Bartender’s Rule
The Manhattan is a spirit-only cocktail. It should always be stirred, never shaken. Shaking aerates the drink, making it cloudy and introducing too much dilution. Stirring maintains its beautiful clarity and silky texture. Serve it in a chilled coupe or a martini glass for the perfect presentation.
Popular Manhattan Variations
Perfect Manhattan: Uses equal parts sweet and dry vermouth (0.5 oz of each) for a drier, more complex flavor.
Black Manhattan: Replaces the sweet vermouth with an Italian amaro, like Averna, for a rich, bittersweet profile.
Rob Roy: Swaps the rye whiskey for Scotch whisky.
The Cosmopolitan: The Modern Pink Icon
If the Manhattan is old-world charm, the Cosmopolitan is modern chic. This vibrant pink drink exploded in popularity in the 1990s, thanks in no small part to its starring role in the TV show Sex and the City.
The Rise of a Modern Classic
The “Cosmo” wasn’t born in the 90s, but it was perfected then. Bartenders in the 1980s were experimenting with new flavored vodkas. The modern version is widely credited to Toby Cecchini in 1988, who refined an existing recipe by using fresh lime juice and Cointreau. It became the symbol of a fun, cosmopolitan lifestyle.
The Perfect Cosmopolitan Recipe
A well-made Cosmopolitan is balanced, tart, and refreshing—not the overly sweet drink it’s sometimes mistaken for.
Ingredient
Amount
Notes
Citrus Vodka
1.5 oz (45 ml)
Lemon or citron-flavored vodka adds a bright layer.
Cointreau
1 oz (30 ml)
A high-quality orange liqueur is essential for depth.
Fresh Lime Juice
0.75 oz (22 ml)
Always use fresh-squeezed juice. It makes all the difference.
Cranberry Juice
0.5 oz (15 ml)
Just a splash for color and a hint of tartness. Use 100% cranberry, not cocktail.
Garnish
Orange or Lemon Twist
Expressing the oils from the peel over the drink adds aroma.
Instructions:
Fill a cocktail shaker with ice.
Add the citrus vodka, Cointreau, fresh lime juice, and cranberry juice.
Shake vigorously for 10-15 seconds until the shaker is ice-cold.
Double-strain the cocktail into a chilled martini glass. (Double-straining uses a fine mesh strainer to catch tiny ice chips).
Garnish with an orange or lemon twist.
Why Shaking Matters for a Cosmo
Unlike the Manhattan, the Cosmopolitan contains citrus juice. Shaking serves three purposes: it chills, dilutes, and aerates the drink. The aeration creates a lighter, frothier texture that is perfect for a citrus-forward cocktail. Shaking is what gives the Cosmo its lively character.
Cosmopolitan Twists
White Cosmopolitan: Replaces cranberry juice with white cranberry juice and uses an elderflower liqueur like St-Germain.
Pomegranate Cosmo: Uses pomegranate juice instead of cranberry for a deeper red color and richer flavor.
The Old Fashioned: The Original Cocktail
The Old Fashioned isn’t just a cocktail; it’s the definition of a cocktail. It is the grandfather of all mixed drinks, a pure and simple celebration of good whiskey.
A Cocktail of Legend
In the early 1800s, a “cocktail” was defined as a mix of spirits, sugar, water, and bitters. As new, fancier drinks emerged, patrons began asking for a drink made the “old-fashioned way.” This is how the Old Fashioned got its name. It’s a testament to the idea that simple is often best.
“There is something beautiful in its simplicity. It’s the purest expression of a cocktail you can find.” – Modern Mixologist
Crafting the Timeless Old Fashioned
Building an Old Fashioned directly in the glass is part of its ritual.
Ingredient
Amount
Notes
Bourbon or Rye Whiskey
2 oz (60 ml)
Bourbon is sweeter and smoother; rye is spicier.
Sugar Cube
1
Or use 1 tsp of simple syrup (1:1 sugar and water).
Angostura Bitters
2-3 dashes
The spice rack of the cocktail world.
Splash of Water or Club Soda
a small splash
Just enough to help dissolve the sugar.
Garnish
Orange Peel
The essential final touch for its aromatic oils.
Instructions:
Place the sugar cube in an Old Fashioned glass (also known as a rocks glass).
Add the dashes of Angostura bitters and a small splash of water.
Muddle the sugar cube until it is dissolved into a syrup.
Add a large ice cube or several smaller ones to the glass.
Pour the whiskey over the ice.
Stir gently to combine and chill.
Express an orange peel over the drink by squeezing it to release its oils, then drop it into the glass as a garnish.
The Great Muddle Debate
One of the biggest controversies in the cocktail world is whether to muddle fruit in an Old Fashioned. Traditionalists argue that only the sugar, bitters, and water should be muddled. The orange peel is for garnish and aroma only. A more modern, “Wisconsin-style” Old Fashioned often includes a muddled orange slice and cherry, creating a much sweeter, fruitier drink. For a classic experience, stick to the peel.
The Margarita: The Ultimate Fiesta Drink
No cocktail says “party” quite like a Margarita. This tequila-based classic is the most popular cocktail in the world for a reason. It’s the perfect balance of boozy, sweet, and sour.
Tales from South of the Border
The Margarita’s exact origin is a mystery, with dozens of claims dating from the 1930s and 40s. One story credits it to a Mexican restaurant owner named Carlos “Danny” Herrera, who created it for a showgirl allergic to all spirits except tequila. Another tale names a Dallas socialite, Margarita Sames, as its inventor. Regardless of its true creator, the drink’s popularity soared in America, becoming a staple of Mexican restaurants and bars everywhere.
The Ultimate Margarita Recipe
Forget the sugary pre-made mixes. A real Margarita uses just three simple ingredients.
Ingredient
Amount
Notes
Blanco Tequila
2 oz (60 ml)
Use 100% blue agave tequila for the best flavor.
Cointreau or Triple Sec
1 oz (30 ml)
Cointreau is a premium triple sec that adds a clean orange flavor.
Fresh Lime Juice
1 oz (30 ml)
This is non-negotiable. Bottled juice will ruin the drink.
Garnish
Lime Wedge and Salt Rim
The salt rim enhances the flavors.
Instructions:
Prepare your glass. Rub a lime wedge around the rim of a margarita or rocks glass. Dip the rim in a plate of coarse salt.
Fill a cocktail shaker with ice.
Add the tequila, Cointreau, and fresh lime juice.
Shake well for about 15 seconds until chilled.
Strain the cocktail into your prepared glass, filled with fresh ice.
Garnish with a lime wedge.
Fresh vs. Sour Mix: The Key to Quality
The single most important tip for a great Margarita is to use fresh lime juice. The bright, tart flavor is what balances the tequila and orange liqueur. Pre-made “sour mixes” are often loaded with high-fructose corn syrup and artificial flavors, resulting in a cloyingly sweet and unbalanced drink. Squeezing your own limes takes a minute and elevates the drink from mediocre to magnificent.
Margarita Variations
Spicy Margarita: Muddle a few slices of jalapeño in the shaker before adding the other ingredients.
Tommy’s Margarita: A modern classic that replaces the orange liqueur with agave nectar (about 0.5 oz) for a purer tequila flavor.
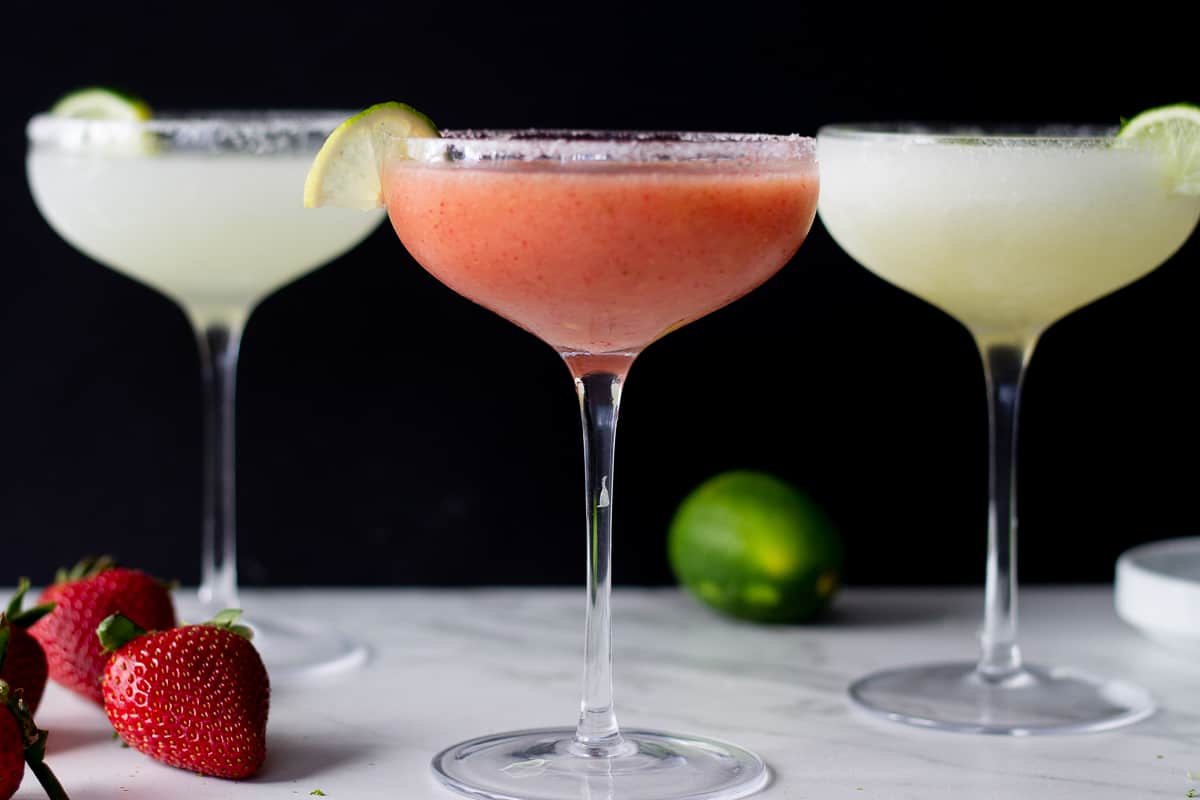
Frozen Margarita: Blend the ingredients with a large amount of ice until smooth.
The Mojito: The Refreshing Taste of Cuba
The Mojito is a tall, refreshing highball that instantly transports you to a sunny beach in Havana. Its combination of mint, lime, and rum is one of the most invigorating flavor profiles in the cocktail world.
A Taste of Havana
The Mojito’s roots trace back to 16th-century Cuba. An early version known as “El Draque,” named after Sir Francis Drake, used a crude rum-like spirit, sugar, lime, and mint. The modern Mojito as we know it, made with refined rum, gained international fame thanks to its association with author Ernest Hemingway, who was a famous patron of Havana’s La Bodeguita del Medio.
Making the Perfect Mojito
A great Mojito is all about technique, particularly how you handle the mint.
Ingredient
Amount
Notes
White Rum
2 oz (60 ml)
A clean, crisp Cuban-style rum is traditional.
Fresh Lime Juice
1 oz (30 ml)
Provides the essential sour backbone.
Mint Leaves
6-8 leaves
Use fresh, vibrant mint leaves.
Superfine Sugar
2 tsp
Dissolves more easily than granulated sugar. Or use 0.75 oz of simple syrup.
Club Soda
a splash
To top off the drink.
Garnish
Mint Sprig
For aroma.
Instructions:
In a sturdy highball glass, add the mint leaves and sugar (or simple syrup).
Gently muddle the mint. The goal is to press the leaves to release their oils, not shred them into tiny pieces.
Add the fresh lime juice and white rum.
Fill the glass about two-thirds full with crushed ice.
Stir with a bar spoon to combine and chill the ingredients.
Top with club soda.
Garnish with a fresh mint sprig. Lightly clap it between your hands before adding it to release its aroma.
The Art of the Gentle Muddle
The most common mistake when making a Mojito is over-muddling the mint. If you shred the leaves, you release bitter-tasting chlorophyll, which will ruin the drink’s fresh flavor. Be gentle. A few light presses are all you need to awaken the mint’s fragrant oils.
Beyond the Big Five: Other Essential Icons
While the five cocktails above are pillars of the bartending world, many others deserve a place in the hall of fame.
The Martini: The ultimate test of a bartender’s skill. The debate over gin vs. vodka and shaken vs. stirred is legendary. A classic gin martini is stirred with dry vermouth and garnished with a lemon twist or an olive.
The Negroni: A bold and bitter Italian classic. It follows a simple, perfect formula: equal parts gin, Campari, and sweet vermouth. It’s an acquired taste that becomes an obsession.
The Daiquiri: Not the frozen, sugary version from a machine. The classic Daiquiri is a simple, elegant cocktail of rum, fresh lime juice, and sugar, shaken and served in a coupe glass. It is the purest expression of rum.
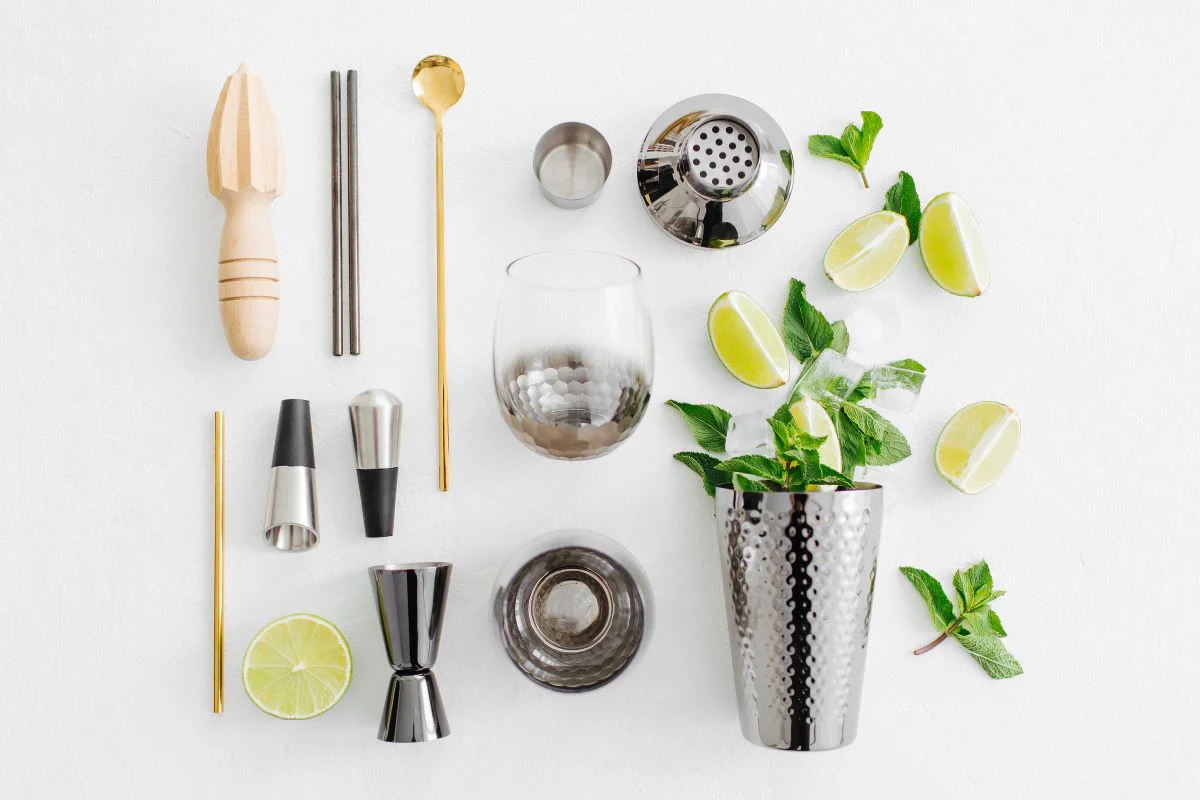
Your Home Bartender’s Toolkit
You don’t need a massive collection of tools to start making great cocktails. A few key essentials will cover almost every recipe.
Cocktail Shaker: A Boston shaker (two tins) or a Cobbler shaker (with a built-in strainer) is essential for drinks with juice.
Jigger: For accurate measurements. Consistency is key to a balanced cocktail.
Bar Spoon: For stirring spirit-forward drinks like the Manhattan and for reaching the bottom of a highball glass.
Strainer: A Hawthorne strainer fits on top of a shaker, while a fine mesh strainer is used for double-straining.
Muddler: For pressing mint in a Mojito or dissolving sugar in an Old Fashioned.
A Toast to the Classics
Iconic cocktails are more than just recipes; they are cultural touchstones. They have survived Prohibition, world wars, and changing tastes. They connect us to a rich history of celebration and craftsmanship.
By learning to make these drinks, you are not just mixing spirits. You are becoming part of a tradition. So gather your ingredients, chill your glasses, and start your journey. Experiment with different spirits, perfect your technique, and most importantly, share your creations with friends. Cheers!
Short FAQs
What is the difference between shaking and stirring a cocktail? Stirring is for spirit-only drinks (like a Manhattan) to make them cold and silky. Shaking is for drinks with juice or cream (like a Margarita) to aerate and chill them, creating a lighter texture.
Can I use a different spirit than the one listed in a recipe? Yes, but it will change the drink’s character. Swapping rye for bourbon in an Old Fashioned is common. Swapping gin for whiskey is not. Experimentation is part of the fun!
What is sweet vermouth? It’s a fortified, aromatized wine flavored with various botanicals. It adds sweetness and complexity to cocktails like the Manhattan and Negroni.
Do I need expensive liquor to make good cocktails? You don’t need the most expensive bottle, but you should avoid the cheapest. A good mid-range spirit (like a 100% agave tequila or a quality rye whiskey) will dramatically improve your cocktails.
What is the easiest iconic cocktail for a beginner to make? The classic Daiquiri (rum, lime, sugar) or a simple highball like a Gin and Tonic are great starting points. They teach the importance of balance with few ingredients.
Imagine the sun warming your skin. A gentle breeze rustles through palm trees. You hear the soft sound of waves in the distance. What’s in your hand? For many, the answer is a tall, frosty glass of Piña Colada. This single drink can transport you to a tropical paradise. It’s more than a cocktail; it’s a mini-vacation.
Welcome to the ultimate guide to tropical drinks. We will dive deep into the world of the iconic Piña Colada. We will show you how to make the perfect one at home. We will also explore its fun variations. But the journey doesn’t stop there. We will introduce you to other legendary tropical drinks that deserve a spot in your recipe book. Here at FastFlavorz, we believe that amazing flavors should be easy to create. Get ready to turn your kitchen into a beachfront bar.
The Allure of the Tropics in a Glass
What makes a drink “tropical”? It’s a combination of flavors, aromas, and feelings. These drinks are often built around fruits that grow in warm climates. Think of juicy pineapple, creamy coconut, sweet mango, and zesty lime. They capture the essence of sunshine and relaxation.
The magic is in the balance. A great tropical drink is usually a mix of sweet and sour. The sweetness comes from ripe fruit and syrups. The sourness comes from citrus like lime or lemon juice. This combination creates a refreshing taste that is never boring. Many tropical drinks also feature rum, a spirit made from sugarcane, which adds its own sweet and complex character.
But it’s not just about taste. It’s a full sensory experience. The vibrant colors are a feast for the eyes. The fruity aroma teases your nose before you even take a sip. The frosty chill of a blended drink provides instant relief on a hot day.
“A tropical drink is one part flavor, two parts sunshine, and three parts happiness.”
These drinks invite you to slow down. You can’t rush a well-made Mojito or a layered Miami Vice. They are meant to be savored. They are perfect for parties, barbecues, or simply unwinding after a long week.
The Star of the Show: The Classic Piña Colada
Among all tropical drinks, the Piña Colada reigns supreme. Its name translates to “strained pineapple” in Spanish. This creamy, sweet, and satisfying cocktail is loved all over the world. It’s simple, yet decadent.
A Sip of History: The Birth of the Piña Colada
The story of the Piña Colada takes us to San Juan, Puerto Rico. The most widely accepted tale credits its invention to a bartender named Ramón “Monchito” Marrero. He worked at the Caribe Hilton Hotel. In 1954, after three months of experimenting, he perfected the recipe. He wanted to capture all the flavors of Puerto Rico in a single glass. He blended rum, cream of coconut, and pineapple juice. The result was an instant hit.
The drink became so beloved that in 1978, Puerto Rico declared the Piña Colada its official national drink. It’s a symbol of the island’s vibrant culture and hospitality. Every time you sip a Piña Colada, you are tasting a piece of Caribbean history.
The Anatomy of a Perfect Piña Colada
The beauty of the Piña Colada lies in its simplicity. It only has three core ingredients. But the quality of these ingredients makes all the difference.
Pineapple Juice: This is the heart of the drink. It provides the signature sweet and tart flavor. For the best taste, use high-quality, 100% pineapple juice, not from concentrate. Freshly juiced pineapple is even better if you have the time.
Cream of Coconut: This is the secret to the drink’s creamy texture and rich coconut flavor. It is crucial to use “cream of coconut,” not coconut milk or coconut cream. Cream of coconut is a sweetened, processed coconut product with a thick, syrupy consistency. Brands like Coco López are the traditional choice.
Rum: The spirit of the Caribbean. A light or white rum is the classic choice. It provides the alcoholic kick without overpowering the fruit flavors. It adds a subtle sweetness and complexity that ties everything together.
The Ultimate Piña Colada Recipe
Ready to make the best Piña Colada of your life? It’s easier than you think. This recipe is for a classic, blended Piña Colada. It’s thick, frosty, and incredibly delicious.
Here are the ingredients you will need for one serving.
Ingredient
Amount
Notes
Light Rum
2 oz (60 ml)
Use your favorite brand.
Cream of Coconut
2 oz (60 ml)
Essential for creaminess.
Pineapple Juice
2 oz (60 ml)
Use a good quality juice.
Frozen Pineapple Chunks
1 cup
This makes the drink thick and frosty.
Ice
½ cup
Optional, for an even frostier drink.
Garnish
Pineapple Wedge
For a classic look.
Garnish
Maraschino Cherry
For a pop of color.
Instructions:
Prepare Your Glass. For the best experience, place your serving glass (a hurricane glass is traditional) in the freezer for about 15 minutes. A chilled glass keeps your drink colder for longer.
Gather Your Ingredients. Measure out your rum, cream of coconut, and pineapple juice. Have your frozen pineapple chunks ready. Using frozen fruit is a pro-tip. It eliminates the need for a lot of ice, which can water down the flavor.
Combine in a Blender. Add all the ingredients to a high-powered blender. Put the liquids in first (rum, cream of coconut, juice). Then add the solid ingredients (frozen pineapple, ice). This helps the blender work more efficiently.
Blend Until Smooth. Secure the lid on your blender. Start blending on a low speed, then gradually increase to high. Blend for about 30-45 seconds. You are looking for a smooth, thick, almost soft-serve consistency. There should be no chunks of ice or fruit left.
Pour and Garnish. Pour the blended mixture into your chilled glass. The drink should be thick enough to stand up on its own. Garnish with a fresh pineapple wedge on the rim of the glass. Top it off with a bright red maraschino cherry. Add a fun straw or a paper umbrella if you’re feeling festive.
Serve Immediately. A frozen Piña Colada is best enjoyed right away, while it’s at its coldest and thickest.
Pro Tips for a Flawless Piña Colada
Want to elevate your drink from good to unforgettable? Follow these simple tips.
Don’t Skimp on the Cream of Coconut: This ingredient is non-negotiable. Coconut milk will not give you the right sweetness or texture. Squeeze bottles of cream of coconut make pouring and measuring easy.
Taste and Adjust: Your pineapple might be sweeter or more tart. After blending, give it a quick taste. If it’s too tart, you can add a little more cream of coconut. If it’s too sweet, a small squeeze of fresh lime juice can balance it out.
Choose Your Rum Wisely: While light rum is classic, you can experiment. A gold rum can add a bit more character. A dark rum floater on top can add a rich, molasses-like aroma and flavor.
Batch for a Party: You can easily scale this recipe for a crowd. Mix the rum, cream of coconut, and pineapple juice in a pitcher ahead of time. When your guests arrive, simply blend the mixture in batches with frozen pineapple. This ensures every drink is fresh and frosty.
Piña Colada Variations: A Twist on the Classic
The classic Piña Colada is a masterpiece. But it’s also a fantastic base for creativity. Here are a few popular variations to try.
The Virgin Piña Colada (The “Piñita Colada”)
Want all the tropical flavor without the alcohol? The Virgin Piña Colada is the perfect solution. It’s a family-friendly treat that everyone can enjoy.
How to make it: Simply omit the rum. To make up for the lost liquid, you can add an extra ounce of pineapple juice and an extra ounce of cream of coconut. Blend as usual with frozen pineapple. It’s just as creamy and delicious.
The Miami Vice
Why choose between two amazing frozen drinks when you can have both? The Miami Vice is a visually stunning layered drink. It is half Strawberry Daiquiri and half Piña Colada.
How to make it:
First, prepare a classic Strawberry Daiquiri. Blend light rum, lime juice, simple syrup, and frozen strawberries. Pour this mixture into the bottom half of your glass.
Next, clean your blender. Prepare a classic Piña Colada.
Slowly pour the Piña Colada on top of the Strawberry Daiquiri layer. You can pour it over the back of a spoon to help create a distinct line. The result is a beautiful red and white swirl that tastes like a dream.
The Lava Flow
This is another layered beauty, similar to a Miami Vice but with a different technique. It creates an effect that looks like lava flowing up the sides of the glass.
How to make it:
Start with the strawberry element. Muddle fresh strawberries with a little simple syrup in the bottom of your glass. Or, you can use a strawberry purée.
In a blender, mix your Piña Colada ingredients (rum, pineapple juice, cream of coconut, and a frozen banana for extra creaminess).
Slowly pour the Piña Colada mixture into the glass. As you pour, the strawberry purée will be pushed up the sides, creating the “lava flow” effect.
Exploring Different Flavors
Don’t be afraid to add other fruits to your Piña Colada.
Mango Colada: Add half a cup of frozen mango chunks to the classic recipe.
Banana Colada: Add one frozen banana for extra creaminess and flavor.
Blue Hawaiian: Add a splash of Blue Curaçao. This will turn your drink a beautiful ocean blue and add a hint of orange flavor.
Beyond the Piña Colada: A Tour of Other Tropical Drinks
The world of tropical cocktails is vast and exciting. If you love the Piña Colada, you will surely enjoy these other classics. Each has its own unique personality and story.
“To create a good cocktail, you must first dream of a good beach.”
The Mighty Mai Tai
The Mai Tai is a legend in the tiki world. It’s stronger and more complex than a Piña Colada. It’s for those who appreciate a rum-forward drink with layers of flavor.
Origin: The Mai Tai has a contested history. Most credit its invention to Victor J. “Trader Vic” Bergeron in 1944 in Oakland, California.
Key Ingredients: It traditionally uses two types of rum (light and dark), orange curaçao, fresh lime juice, and orgeat syrup (a sweet almond syrup with a hint of rose water).
Taste Profile: The Mai Tai is nutty, citrusy, and strong. The orgeat syrup gives it a unique, marzipan-like flavor that is its signature. It’s typically shaken and served over ice, not blended.
The Zesty Mojito
The Mojito is the ultimate refresher. It’s light, minty, and bubbly. It’s the perfect antidote to a hot summer day.
Origin: The Mojito hails from Havana, Cuba. Its origins can be traced back centuries, but it was popularized in the bars of Havana and made famous by author Ernest Hemingway.
Key Ingredients: The magic of a Mojito comes from muddling fresh mint leaves with sugar and lime juice. White rum is added, then the glass is filled with ice and topped with club soda.
Taste Profile: It’s a perfect balance of sweet, sour, and herbaceous. The muddled mint releases its essential oils, creating an incredibly fresh aroma and taste. It’s crisp and clean, not creamy like a Piña Colada.
The Bold Hurricane
This drink is as powerful and vibrant as its name suggests. Known for its bright red color and potent punch, the Hurricane is a party in a glass.
Origin: The Hurricane was invented at Pat O’Brien’s bar in New Orleans during the 1940s. The story goes that they had an excess of rum and created this drink to help sell it.
Key Ingredients: The signature flavor of a Hurricane comes from passion fruit juice. This is mixed with both light and dark rum, and sometimes other fruit juices like orange or lime.
Taste Profile: The Hurricane is very sweet, very fruity, and very strong. The passion fruit gives it a unique tropical tang. It’s served over ice in its signature curvy “hurricane lamp” glass.
The Simple and Sweet Rum Punch
Rum Punch is less a specific recipe and more a template for deliciousness. It’s the perfect big-batch drink for any gathering. The old Caribbean rhyme helps you remember the ratio: “One of Sour, Two of Sweet, Three of Strong, and Four of Weak.”
One Part Sour: Lime juice.
Two Parts Sweet: Simple syrup, grenadine, or fruit juice.
Three Parts Strong: Rum (usually a mix of light and dark).
Four Parts Weak: Water, club soda, or more fruit juice.
Taste Profile: It can be whatever you want it to be! You can customize it with different juices like pineapple, orange, and guava. A dash of Angostura bitters and a sprinkle of nutmeg on top adds complexity.
Tools of the Tropical Trade
You don’t need a professional bar to make amazing tropical drinks. However, a few key tools will make the process much easier and give you better results.
A Good Blender: This is essential for frozen drinks like the Piña Colada. A high-powered blender will crush ice and frozen fruit into a perfectly smooth consistency.
A Cocktail Shaker: For drinks that are shaken, not blended, like the Mai Tai. A shaker chills the drink quickly and mixes the ingredients perfectly.
A Jigger: This is a small hourglass-shaped measuring tool. It helps you pour accurate amounts of spirits and mixers. Consistent measurements are key to a balanced cocktail.
A Muddler: This tool looks like a small baseball bat. It’s used to press and mash ingredients like mint and lime in the bottom of a glass for a Mojito.
Your Tropical Escape Awaits
You now have all the knowledge you need. You can create a perfect, creamy Piña Colada. You can explore exciting variations. You can even venture out and try other classic tropical cocktails. The goal is to have fun and enjoy the process.
Don’t be afraid to experiment. Add your favorite fruit. Try a different kind of rum. Adjust the sweetness to your liking. The best drink is the one that makes you happy. So grab your blender, put on some music, and let these fast flavors transport you to your own personal paradise. Cheers!
Frequently Asked Questions (FAQs)
Q1: Can I make a Piña Colada without a blender? A: Yes. You can shake all the ingredients (using pineapple juice instead of frozen fruit) with ice in a cocktail shaker. Strain it into a glass with fresh ice. This is called a Piña Colada “on the rocks.” The texture will be thinner, not frozen.
Q2: What is the difference between cream of coconut and coconut milk? A: Cream of coconut (like Coco López) is very thick, sweet, and syrupy. Coconut milk is unsweetened and has a much thinner consistency. Using coconut milk will result in a less sweet and less creamy drink.
Q3: What is the best rum for a Piña Colada? A: A light or white rum is the traditional choice because it has a mild flavor that lets the fruit shine. However, a gold or aged rum can add more complexity and a hint of vanilla or caramel.
Q4: How can I make my tropical drinks less sweet? A: To reduce sweetness, you can use less cream of coconut or simple syrup. You can also add a bit more fresh lime juice. The acidity from the lime will cut through the sweetness and create a more balanced drink.
Q5: Can I prepare these drinks in advance for a party? A: You can mix the non-frozen base ahead of time. For Piña Coladas, mix the rum, juice, and cream of coconut and store it in the fridge. For punches, mix everything except the carbonated elements. Blend with ice or add club soda just before serving to keep them fresh.
Welcome to the exciting world of home bartending. Have you ever sipped a perfectly balanced cocktail at a fancy bar and thought, “I wish I could make this at home”? The good news is, you can. It’s easier and more rewarding than you might imagine. You don’t need a wall of obscure bottles to get started.
Building a home bar is a journey, not a race. It’s about curating a collection that lets you create delicious drinks for yourself and your guests. This guide will walk you through the absolute essentials. We will cover the foundational spirits, the crucial modifiers, and the supporting characters that turn a simple drink into a memorable experience.
Whether you want to master a classic Old Fashioned or shake up a zesty Margarita, it all begins with the right ingredients. Let’s build your home bar from the ground up.
The Foundation: The Core Spirits
Spirits are the backbone of almost every cocktail. They provide the alcoholic base and the primary flavor profile. To start, you don’t need one of everything. Focusing on a few versatile, high-quality bottles will serve you better than a dozen cheap ones.
1. Vodka: The Versatile Chameleon
Vodka is the ultimate neutral spirit. Its clean and often subtle flavor profile makes it a perfect canvas for a wide range of drinks. It doesn’t overpower other ingredients. Instead, it lets them shine.
A good vodka should be smooth, not harsh. You don’t need to break the bank on a top-shelf bottle for mixing, but it’s wise to avoid the cheapest plastic options. A solid mid-range choice will be perfect for everything from simple highballs to more complex creations.
Key Cocktails:
Moscow Mule (Vodka, ginger beer, lime)
Cosmopolitan (Vodka, triple sec, cranberry, lime)
Screwdriver (Vodka, orange juice)
Vodka Martini (Vodka, dry vermouth)
2. Gin: The Botanical Powerhouse
Gin is essentially a flavored vodka, with its primary botanical being juniper. However, the world of gin is incredibly diverse. Some are juniper-forward and piney (like a classic London Dry), while others are more floral, citrusy, or contemporary.
Because of this complexity, gin can create cocktails with incredible depth. A good London Dry Gin is the most versatile starting point. It’s the key to many timeless classics.
Key Cocktails:
Gin and Tonic (Gin, tonic water)
Tom Collins (Gin, lemon juice, simple syrup, club soda)
Negroni (Gin, Campari, sweet vermouth)
Gimlet (Gin, lime juice, simple syrup)
3. Rum: The Spirit of the Tropics (and Beyond)
Rum is distilled from sugarcane byproducts, like molasses, or directly from sugarcane juice. It’s not just for tiki drinks. Its flavor profile can range from light and grassy to dark, rich, and funky.
For a versatile home bar, you should aim to have two types:
Light Rum (White or Silver): This rum is light-bodied and subtly sweet. It’s perfect for cocktails where you want a clean rum flavor without too much molasses. It’s the star of the Mojito and the Daiquiri.
Dark Rum (Aged): Aged in barrels, this rum develops complex flavors of caramel, vanilla, and spice. It’s excellent for sipping and adds incredible depth to cocktails like the Dark ‘n’ Stormy or a Rum Old Fashioned.
4. Tequila: More Than Just a Shot
Tequila has shaken off its party-shot reputation to be recognized as a sophisticated and versatile spirit. Made from the blue weber agave plant, its earthy, sweet, and sometimes peppery notes are unmistakable.
Like rum, having two types on hand is ideal:
Blanco (Silver or Plata): This is unaged tequila. It has a pure, agave-forward flavor that is crisp and clean. It is the go-to for Margaritas and Palomas.
Reposado: Meaning “rested,” this tequila is aged in oak barrels for a short period (between two months and a year). This mellows the spirit and adds notes of oak and vanilla. It makes a fantastic, smoother Margarita and is great for sipping.
“The best way to enjoy a good tequila is to respect its origins and savor its complexity. It’s a spirit with a story in every sip.”
5. Whiskey: The Spirit of Grains
Whiskey is a vast and beloved category. It’s made from fermented grain mash and aged in wooden casks. The type of grain and an aging process defines its flavor. For a beginner’s bar, two American styles are essential.
Bourbon: By law, bourbon must be made in the U.S. from at least 51% corn and aged in new charred oak barrels. This gives it a sweeter profile with notes of vanilla, caramel, and oak. It’s the foundation for the Old Fashioned, Whiskey Sour, and Mint Julep.
Rye Whiskey: Rye must be made from at least 51% rye grain. It tends to be spicier and drier than bourbon, with a peppery bite. It’s the traditional choice for a Manhattan or a Sazerac.
The Modifiers: Liqueurs and Fortified Wines
If spirits are the lead actors, liqueurs are the supporting cast. They add sweetness, flavor, and complexity, transforming a simple mix into a true cocktail.
1. Orange Liqueur
An orange-flavored liqueur is arguably the most essential modifier you can own. It’s a key ingredient in countless classic cocktails. There are a few types to know:
Triple Sec: The most basic style. It’s sweet and straightforward.
Cointreau: A premium brand of triple sec. It has a cleaner, more robust, and less syrupy flavor. It’s an excellent investment.
Grand Marnier: A cognac-based orange liqueur. It’s richer and more complex, often used in high-end Margaritas or enjoyed on its own.
Key Cocktails: Margarita, Cosmopolitan, Sidecar.
2. Vermouth
Vermouth is a fortified wine. This means it’s a wine that has been “fortified” with a neutral spirit (like brandy) and aromatized with a blend of botanicals. It is a critical component of many iconic cocktails. It must be refrigerated after opening.
Dry Vermouth: Pale in color and dry in flavor, with herbal notes. It’s essential for a Martini.
Sweet Vermouth: Red in color and sweet in taste, with notes of vanilla, caramel, and spice. It’s the backbone of the Manhattan and Negroni.
3. Essential Aperitifs & Amari
Amari (singular: amaro) are Italian herbal liqueurs with a bittersweet flavor. They are fantastic for stimulating the appetite (aperitifs) or settling the stomach (digestifs).
Campari: This bright red, intensely bitter amaro is a non-negotiable for any Negroni lover. Its flavor is a complex mix of bitter orange, rhubarb, and herbs.
Aperol: Campari’s sweeter, less-alcoholic cousin. It has a vibrant orange hue and a more approachable, citrus-forward bitterness. It’s the star of the world-famous Aperol Spritz.
The Lengtheners: Essential Mixers
Mixers add volume to a drink, balancing the strength of the spirit and adding flavor and effervescence. Quality matters here.
1. Sodas
Club Soda: Simple carbonated water. It adds bubbles without adding flavor, perfect for a Tom Collins or a Vodka Soda.
Tonic Water: Carbonated water with quinine, which gives it a distinctively bitter taste. Essential for a Gin and Tonic. Look for brands that use real sugar instead of high-fructose corn syrup.
Ginger Beer & Ginger Ale: Ginger ale is a milder, sweeter soda. Ginger beer is spicier and has a much stronger ginger kick. A good, spicy ginger beer is a must for a proper Moscow Mule or Dark ‘n’ Stormy.
2. Juices: Fresh is Always Best
This is the single most important rule in cocktail making. Pre-packaged, from-concentrate juices are often full of sugar and preservatives that will make your drinks taste flat and artificial. Squeezing your own juice is a small step that makes a world of difference.
“The difference between using fresh lime juice and bottled sour mix in a Margarita is the difference between a real flower and a plastic one.”
Essential Fresh Juices:
Lemon Juice: For Whiskey Sours, Tom Collins, and countless others.
Lime Juice: For Margaritas, Daiquiris, Gimlets, and Moscow Mules.
Good-to-Have Juices (Quality bottled is acceptable here):
Cranberry Juice: For Cosmopolitans and Sea Breezes.
Orange Juice: For Screwdrivers and Mimosas.
Pineapple Juice: For Piña Coladas and tropical drinks.
The Seasoning: Syrups and Bitters
Think of these as the salt and pepper of your bar. They are used in small quantities but have a massive impact on the final taste, adding balance, sweetness, and aromatic complexity.
1. Simple Syrup
Simple syrup is just that: simple. It’s a mixture of equal parts sugar and hot water, stirred until the sugar dissolves. Using syrup instead of granulated sugar ensures it dissolves fully in cold liquids. You can easily make this at home in five minutes.
How to Make Simple Syrup:
Combine 1 cup of white sugar and 1 cup of hot water in a jar or bottle.
Stir or shake until the sugar is completely dissolved.
Let it cool and store it in the refrigerator for up to a month.
2. Bitters
Bitters are concentrated alcoholic infusions of barks, roots, herbs, and spices. A few dashes can tie all the flavors of a drink together and add an aromatic dimension.
Aromatic Bitters: Angostura bitters are the most famous brand. With its iconic oversized label, this is a must-have for an Old Fashioned and a Manhattan. It has a spicy, clove-like aroma.
Orange Bitters: These provide a citrusy, slightly bitter orange peel flavor. They are wonderful in a Martini or to add a twist to an Old Fashioned.
The Final Touch: Garnishes
Garnishes aren’t just for looks. They add a crucial aromatic element that enhances the drinking experience. The scent of a fresh lemon twist as you lift the glass is part of the cocktail.
Citrus: Lemons and limes are your workhorses. You can cut them into wheels, wedges, or twists (a strip of peel).
Cocktail Cherries: Ditch the bright red, sugary maraschino cherries from your childhood. Invest in a jar of high-quality cherries like Luxardo or Amarena. They are rich, complex, and delicious. Essential for a proper Manhattan or Old Fashioned.
Olives: For Martinis. Choose good quality cocktail olives packed in brine.
Fresh Mint: A must-have for Mojitos and Mint Juleps.
Your Essential Ingredient Checklist
To make it easy, here is a table summarizing the most important ingredients to start your home bar.
Category
Ingredient
Key Cocktails
Spirits
Vodka
Moscow Mule, Cosmopolitan
London Dry Gin
Gin and Tonic, Negroni
Light Rum
Daiquiri, Mojito
Tequila Blanco
Margarita, Paloma
Bourbon Whiskey
Old Fashioned, Whiskey Sour
Liqueurs
Orange Liqueur (Cointreau)
Margarita, Sidecar
Dry Vermouth
Martini
Sweet Vermouth
Manhattan, Negroni
Campari
Negroni, Americano
Syrups & Bitters
Simple Syrup
Whiskey Sour, Daiquiri, Tom Collins
Aromatic Bitters
Old Fashioned, Manhattan
Garnishes
Lemons & Limes
Nearly everything
Quality Cherries
Manhattan, Old Fashioned
Putting It All Together: 5 Easy Cocktails to Start
With the ingredients above, you can make a huge number of classic cocktails. Here are five simple recipes to get you started and show you how these elements work together.
Stir ingredients with ice. Strain into a rocks glass with a large ice cube. Garnish with an orange twist.
Margarita
2 oz Tequila Blanco, 1 oz Lime Juice, ¾ oz Orange Liqueur
Shake all ingredients with ice. Strain into a salt-rimmed rocks glass with fresh ice. Garnish with a lime wheel.
Daiquiri
2 oz Light Rum, 1 oz Lime Juice, ¾ oz Simple Syrup
Shake all ingredients with ice. Strain into a chilled coupe or cocktail glass. Garnish with a lime wheel.
Gin and Tonic
2 oz Gin, 4 oz Tonic Water
Build in a tall glass with ice. Stir gently. Garnish with a lime wedge.
Negroni
1 oz Gin, 1 oz Campari, 1 oz Sweet Vermouth
Stir all ingredients with ice. Strain into a rocks glass with a large ice cube. Garnish with an orange twist.
Building Your Bar Strategically
Seeing this list can feel overwhelming. Remember the golden rule: start small. You don’t need to buy everything at once.
Pick a Favorite Cocktail: Love Margaritas? Start with Tequila, Cointreau, and limes.
Buy a Spirit and Explore: Get a good bottle of bourbon. First, make an Old Fashioned. Next week, buy lemons and make a Whiskey Sour.
Expand Slowly: Once you have your core spirits, add a new liqueur or modifier every month. Before you know it, you’ll have a well-stocked bar capable of making hundreds of drinks.
Creating cocktails at home is a skill that brings immense joy. It’s a creative outlet that allows you to experiment with flavors and share wonderful experiences with friends and family. It’s about slowing down, focusing on a small ritual, and producing something truly delicious.
As you grow more confident, you can explore more advanced spirits like Scotch or Mezcal, and unique liqueurs like Chartreuse or St-Germain. The possibilities are endless. For more simple recipes and flavor inspiration, be sure to explore the rest of FastFlavorz (https://freeblitz.shop/).
Cheers to your new home bar adventure!
Short FAQs
Q1: Do I really need to buy expensive spirits? A1: Not at all. Start with respected mid-range brands. They offer the best balance of quality and value for mixing cocktails. Avoid the very cheapest options.
Q2: How important is fresh juice? A2: It is the single biggest upgrade you can make to your cocktails. The taste is much brighter and more authentic than bottled juices. A simple citrus squeezer is a great investment.
Q3: My vermouth tastes bad after a few weeks. Why? A3: Vermouth is a wine-based product. Once opened, it must be stored in the refrigerator. It will stay fresh for about 1-2 months.
Q4: What is the one piece of bar equipment I should buy first? A4: A cocktail shaker set that includes a shaker, a jigger (for measuring), and a strainer. This will allow you to make a huge variety of shaken and stirred drinks accurately.
Q5: Can I use sugar instead of simple syrup? A5: You can, but it won’t dissolve well in cold drinks, leaving them gritty. Making simple syrup takes just a few minutes and ensures a smooth, well-mixed cocktail.
Welcome to the ultimate guide for margarita lovers! Nothing beats the refreshing chill of a perfectly blended frozen margarita. It’s the taste of summer. It’s the feel of a vacation. Here at FastFlavorz, we believe that making this iconic drink at home should be easy and delicious.
Forget those overly sweet, artificially flavored mixes. We are diving deep into the art of the perfect frozen and fruity margarita. This guide will cover everything. We will explore the best ingredients. We will share essential techniques. We will give you incredible recipes that will impress your friends and family.
Are you ready to transform your kitchen into the best margarita bar in town? Let’s get blending!
What Makes a Margarita “Perfect”? The Core Components
Before we even touch the blender, we need to understand the soul of a margarita. A perfect margarita is all about balance. It’s a delicate dance between sweet, sour, and the signature kick of tequila. For a frozen margarita, we also add temperature and texture to that dance.
The Star of the Show: Choosing Your Tequila
The tequila you choose is the foundation of your drink. It can make or break your margarita. Not all tequilas are created equal.
Blanco (or Silver) Tequila: This is the best choice for frozen and fruity margaritas. Blanco tequila is unaged or aged for a very short time. It has a pure, crisp agave flavor. This clean taste allows the fruit and lime to shine through. It doesn’t compete with the other ingredients. It complements them.
Reposado Tequila: Reposado means “rested.” This tequila is aged in oak barrels for two months to a year. It has a smoother, more complex flavor with hints of vanilla and caramel. A reposado can add a wonderful warmth to your margarita. However, its subtle notes might get a little lost behind strong fruit flavors. It’s a great option if you prefer a less sharp tequila taste.
Añejo Tequila: This tequila is aged for at least one year. It’s a sipping tequila, rich and complex. Its deep, oaky flavors tend to clash with the bright, zesty profile of a fruity margarita. It’s best to save your añejo for enjoying on its own.
Pro-Tip: You don’t need the most expensive tequila on the shelf. A good quality, 100% blue agave mid-range blanco tequila is the perfect workhorse for your margarita adventures.
The Sweet & Sour Balance: Liqueurs and Lime
The classic margarita gets its sweetness and orange notes from an orange liqueur. The sourness comes from fresh lime juice. Getting this ratio right is crucial.
Orange Liqueur: This is what separates a margarita from a simple tequila sour.
Triple Sec: The most common and affordable option. It provides a straightforward orange sweetness.
Cointreau: A step up in quality. Cointreau is a premium brand of triple sec. It has a more refined, crisp, and less syrupy orange flavor.
Grand Marnier: A top-shelf choice. It’s a blend of Cognac and bitter orange. It adds a rich, complex sweetness that works beautifully, though it’s a bolder flavor.
Fresh Lime Juice: This is non-negotiable for a perfect margarita. Please, step away from the bottled lime juice. Bottled juices contain preservatives and have a dull, often bitter taste. The vibrant, tangy flavor of freshly squeezed lime juice is essential. It brightens the entire drink.
The “Fruity” Element: Fresh vs. Frozen Fruit
This is where the fun begins! When making a fruity margarita, you have a choice.
Frozen Fruit: This is the secret weapon for an amazing frozen margarita. Using frozen fruit means you need less ice. Less ice means a more flavorful, less watery drink. Frozen mango chunks, strawberries, and peaches work incredibly well. They create a thick, smooth, sorbet-like consistency.
Fresh Fruit: The flavor of fresh, in-season fruit is unbeatable. If you use fresh fruit, you will need to add more ice to achieve the frozen texture. For soft fruits like berries or watermelon, you can blend them right in. For firmer fruits, chopping them first is a good idea.
The “Frozen” Secret: The Ice-to-Liquid Ratio
The biggest mistake people make with frozen drinks is the ice. Too much ice leads to a chunky, gritty texture that’s hard to drink. Too little ice results in a watery, sad cocktail. The goal is a smooth, thick, “slushy” consistency.
A good starting point is a 1:2 ratio of liquid to frozen solids. This means for every one part of liquid (tequila, liqueur, lime juice), you use two parts of frozen ingredients (ice and/or frozen fruit). You can always adjust as you go.
“A good margarita is a bit like a good story. It has a strong beginning, a complex middle, and a satisfying finish that leaves you wanting more.”
The Essential Equipment for Frozen Margarita Mastery
You don’t need a professional bar setup, but a few key pieces of equipment will make your life much easier. They are the key to achieving that perfect texture.
The Blender: Your Most Important Tool
For frozen drinks, your blender is everything. A weak blender will struggle to crush ice effectively. It will leave you with large, unappetizing ice chunks.
A high-powered blender is a worthy investment for any frozen drink enthusiast. Brands like Vitamix or Blendtec are the gold standard. They pulverize ice and frozen fruit into a perfectly smooth consistency. However, many mid-range blenders (like those from Ninja or NutriBullet) are also powerful enough to get the job done well. Look for a blender with at least 1000 watts of power for the best results.
Glassware and Garnishes
Presentation is part of the experience.
Margarita Glasses: The classic wide-rimmed glass is iconic for a reason. The wide surface area allows the aromas of the drink to greet you with every sip.
Rocks Glasses: A simple rocks glass is also a great, modern choice. It’s sturdy and feels great in your hand.
Garnishes: A simple garnish elevates your drink from homemade to craft-cocktail status. A lime wheel, a fresh strawberry, or a sprig of mint are all beautiful touches. And of course, there’s the classic rim.
The Classic Frozen Margarita: A Step-by-Step Recipe
Let’s start with the foundation. Master this, and you can create any fruity variation you can dream of. This recipe makes two generous margaritas.
Ingredients Table
Ingredient
Amount
Notes
Blanco Tequila
4 oz (1/2 cup)
Use 100% agave tequila.
Orange Liqueur
2 oz (1/4 cup)
Cointreau is preferred.
Fresh Lime Juice
2 oz (1/4 cup)
From about 2-3 limes.
Agave Nectar
1 oz (2 tbsp)
Optional, for extra sweetness.
Ice
3-4 cups
Adjust for desired thickness.
Lime Wedges & Salt
For garnish
For the rim.
Instructions
Prepare Your Glasses. Run a lime wedge around the rim of two margarita glasses. Pour coarse salt onto a small plate. Dip the wet rims into the salt, twisting to coat them evenly. Set the glasses aside.
Combine Liquids. In your blender, add the tequila, orange liqueur, fresh lime juice, and optional agave nectar. Give it a quick pulse to combine.
Add the Ice. Add about 3 cups of ice to the blender.
Blend to Perfection. Start blending on a low speed, then gradually increase to high. Blend until the mixture is completely smooth and no ice chunks remain. This might take 30-60 seconds in a powerful blender.
Check Consistency. If the margarita is too thin, add another handful of ice and blend again. If it’s too thick to pour, add a splash of lime juice or even water to thin it out.
Serve Immediately. Pour the frozen margarita into your prepared glasses. Garnish with a fresh lime wheel and enjoy right away.
Let’s Get Fruity! Popular Frozen Margarita Variations
Now for the fun part. Adding fruit not only introduces delicious flavor but also helps create an incredible texture. For each of these recipes, we will modify the classic base. The key is to replace some of the ice with frozen fruit.
The Iconic Frozen Strawberry Margarita
This is a crowd-pleaser. The sweetness of the strawberries pairs perfectly with the tartness of the lime.
Ingredients:
4 oz Blanco Tequila
2 oz Orange Liqueur
2 oz Fresh Lime Juice
1.5 cups Frozen Strawberries
1.5 cups Ice
Sugar for the rim (optional, but delicious)
Instructions: Follow the same steps as the classic recipe. Use a sugar rim instead of salt for a sweet-and-sour experience. The frozen strawberries provide all the sweetness you need, so agave is usually not necessary.
The Tropical Frozen Mango Margarita
This version will transport you straight to a beach. Mango’s creamy texture and tropical sweetness are a perfect match for tequila.
Ingredients:
4 oz Blanco Tequila
2 oz Orange Liqueur
2.5 oz Fresh Lime Juice (mango is very sweet, so a little extra lime helps)
1.5 cups Frozen Mango Chunks
1.5 cups Ice
Tajín or chili-lime salt for the rim
Instructions: Blend all ingredients until smooth. A chili-lime salt rim provides a fantastic spicy, savory contrast to the sweet mango.
The Refreshing Frozen Watermelon Margarita
There is nothing more refreshing on a hot day than watermelon. This margarita is light, hydrating, and incredibly easy to drink.
Ingredients:
4 oz Blanco Tequila
2 oz Orange Liqueur
2 oz Fresh Lime Juice
2 cups Frozen Cubed Watermelon
1 cup Ice
Salt or a sugar/salt mix for the rim
Instructions: Because watermelon has high water content, you’ll use less ice. Freeze your own watermelon chunks for the best flavor. Simply cube fresh watermelon, place it on a baking sheet in a single layer, and freeze for a few hours.
The Bold Frozen Raspberry or Blackberry Margarita
For those who love a tarter, bolder fruit flavor. Berries add a beautiful, deep color and a sophisticated taste.
Ingredients:
4 oz Blanco Tequila
2 oz Orange Liqueur
2 oz Fresh Lime Juice
1 oz Agave Nectar (berries can be tart)
1.5 cups Frozen Raspberries or Blackberries
1.5 cups Ice
Sugar for the rim
Instructions: Blend everything until smooth. If you don’t like seeds, you can double-strain the mixture through a fine-mesh sieve after blending, although this is less common for frozen drinks.
Pro-Tips for Unforgettable Frozen Margaritas
Ready to level up? These professional tips and tricks will ensure your frozen margaritas are legendary.
Achieving the Perfect Slushy Texture
The texture is everything. Here’s how to troubleshoot:
If it’s too watery: Your ice-to-liquid ratio is off. The easiest fix is to add more frozen fruit or ice, a little at a time, and blend again.
If it’s too thick or won’t blend: Your blender is struggling. You may have too many solids. Add a small splash of liquid (lime juice, tequila, or water) to help get things moving.
Pre-chill your ingredients: Storing your tequila and liqueurs in the freezer for an hour before blending helps keep the final drink colder for longer and prevents it from melting too quickly.
The Art of the Salt (or Sugar) Rim
Don’t just dip the glass. Do it with style.
Use a Plate: Pour your salt, sugar, or Tajín onto a small, flat plate.
Use Fresh Citrus: Cut a wedge of lime. Rub it firmly around the outer edge of the glass rim. Using the wedge gives you more control than dipping the glass in juice.
Dip and Twist: Hold the glass horizontally and gently press the wet rim into the salt. Twist the glass as you press to get an even coating. This prevents salt from falling into your drink.
Batching for a Party
Making margaritas for a crowd? Don’t make them one by one.
You can pre-mix the liquid ingredients (tequila, liqueur, lime juice) in a large pitcher and store it in the refrigerator. When guests are ready, simply pour the desired amount of the liquid base into the blender, add your frozen fruit and ice, and blend. This saves a huge amount of time.
Making it a “Skinny” Margarita
Want the flavor without all the sugar? It’s easy.
Swap the orange liqueur for fresh orange juice (about 1 oz).
Use a low-calorie sweetener like stevia or a small amount of agave nectar to taste.
Load up on fruit for natural sweetness.
The Perfect Virgin Frozen Margarita (Mocktail)
Everyone should be able to enjoy a festive drink. A non-alcoholic frozen margarita is just as delicious.
Replace the tequila and orange liqueur with liquids like sparkling water, coconut water, or orange juice.
A great base is 4 oz of sparkling water, 2 oz of orange juice, and 2 oz of fresh lime juice.
Add a healthy dose of agave nectar to replicate the sweetness and body of the liqueurs. Then, add your frozen fruit and ice and blend as usual.
Comparing Popular Fruit Choices
Choosing your fruit is a matter of taste. This table can help you decide.
Fruit
Flavor Profile
Best Rim Pairing
Pro-Tip
Strawberry
Sweet, Classic, Slightly Tart
Sugar or Salt
Use very ripe, sweet berries for the best flavor.
Mango
Tropical, Sweet, Creamy
Chili-Lime Salt (Tajín)
Use frozen mango chunks to get a perfect sorbet-like texture.
Peach
Delicate, Sweet, Floral
Sugar
A splash of peach schnapps instead of orange liqueur is a great twist.
Watermelon
Ultra-Refreshing, Light, Sweet
Salt
Freeze your own watermelon chunks for the best, most natural flavor.
Raspberry
Tart, Bold, Tangy
Sugar or a Sugar/Salt Mix
Balance the tartness with a little extra agave nectar.
Pineapple
Tropical, Sweet, Tangy
Salt or Sugar
Pairs wonderfully with a splash of coconut cream for a piña colada vibe.
Your Margarita, Your Rules
The most important ingredient in any recipe is creativity. This guide provides a solid foundation. It gives you the knowledge to build the perfect frozen and fruity margarita. But don’t be afraid to experiment.
Try mixing fruits, like strawberry and mango. Add a few jalapeño slices to your blender for a spicy kick. Throw in a handful of fresh mint with your watermelon margarita. The possibilities are endless.
Crafting the perfect margarita is a journey of taste and discovery. So grab your blender, raise a glass, and toast to fast, fresh, and fabulous flavors. Cheers!
Frequently Asked Questions (FAQs)
Q1: Why is my frozen margarita watery? A1: You likely have too much liquid or not enough frozen ingredients. Add more ice or frozen fruit and blend again until you reach your desired thickness.
Q2: Can I make frozen margaritas ahead of time? A2: It’s tricky. You can store it in the freezer, but it will freeze solid. You’ll need to let it thaw slightly and re-blend it before serving to restore the slushy texture.
Q3: What’s the best tequila for a fruity margarita? A3: A 100% agave Blanco (or Silver) tequila is best. Its clean, crisp flavor allows the fruit to be the star of the show.
Q4: Do I have to use an orange liqueur? A4: No. For a simpler, less alcoholic version, you can substitute the orange liqueur with 1 oz of agave nectar and 1 oz of fresh orange juice.
Q5: How can I make my margarita less sweet? A5: Omit any added sweeteners like agave nectar. You can also add a little extra fresh lime juice to increase the tartness and balance the sweetness from the fruit and liqueur.
The peanut butter cookie is a legend. It’s a timeless classic that holds a special place in our hearts. That sweet, salty, and nutty flavor is pure comfort. The iconic crosshatch pattern on top is a promise of the deliciousness to come. It’s the cookie we made as kids and the one we crave as adults.
But what if you could make this classic even better? What if you could take that perfect foundation and build something new and exciting? Here at FastFlavorz, we believe that the best recipes are a starting point for creativity.
This ultimate guide will take you on a journey. We will explore the world of peanut butter cookie variations. We’ll start with the perfect classic recipe. Then, we’ll dive into simple twists, bold flavor combinations, and even diet-friendly options. Get ready to transform your cookie game forever.
The Foundation: A Perfect Classic Peanut Butter Cookie Recipe
Before we can innovate, we must master the original. A great variation starts with a flawless base. This recipe is simple, reliable, and produces a wonderfully soft and chewy cookie. It is the perfect canvas for all the variations to come.
This recipe uses standard pantry ingredients. You probably have everything you need right now. The key is the balance of sugar, butter, and peanut butter. This creates that signature texture we all love.
Ingredients:
1 cup creamy peanut butter
1 cup packed brown sugar
1 cup granulated white sugar
1 cup unsalted butter, softened to room temperature
2 large eggs
2 ½ cups all-purpose flour
1 teaspoon baking soda
½ teaspoon baking powder
¼ teaspoon salt
Instructions:
Preheat Your Oven: Set your oven to 375°F (190°C). Line two baking sheets with parchment paper. This prevents sticking and makes cleanup a breeze.
Cream Butter and Sugars: In a large mixing bowl, beat the softened butter, brown sugar, and white sugar together. Use an electric mixer on medium speed until the mixture is light and fluffy. This step incorporates air, which is key for a soft cookie.
Add Peanut Butter and Eggs: Add the peanut butter and eggs to the creamed sugar mixture. Beat again until everything is well combined. Scrape down the sides of the bowl to ensure everything is mixed in.
Combine Dry Ingredients: In a separate bowl, whisk together the all-purpose flour, baking soda, baking powder, and salt.
Mix Wet and Dry: Gradually add the dry ingredient mixture to the wet ingredients. Mix on low speed until just combined. Be careful not to overmix. Overmixing develops gluten and can make your cookies tough.
Shape the Cookies: Roll the dough into 1-inch balls. Place them about 2 inches apart on your prepared baking sheets.
Create the Crosshatch: Dip a fork in a little granulated sugar. Gently press the tines of the fork onto the top of each cookie dough ball. Then, press again from the opposite direction to create the classic crosshatch pattern. The sugar prevents the fork from sticking.
Bake to Perfection: Bake for 9-11 minutes, or until the edges are lightly golden brown. The centers may still look a little soft. That’s okay! They will continue to bake on the hot pan.
Cool Down: Let the cookies cool on the baking sheet for 5 minutes. This allows them to set. Then, transfer them to a wire rack to cool completely.
“To bake a truly great cookie, you must first respect the classic. The original recipe is not just a set of instructions; it’s a piece of history.”
Level 1: Simple Twists on the Classic
You’ve mastered the classic recipe. Now, let’s start experimenting with easy additions. These simple twists require minimal effort but deliver a big impact on flavor and texture.
The Chocolate Chip Peanut Butter Cookie
This is the king of cookie mashups. The rich, slightly bitter notes of chocolate are the perfect partner for salty, nutty peanut butter. It’s a match made in heaven.
How to do it: Simply fold 1 ½ cups of semi-sweet chocolate chips into your cookie dough at the very end. You can also use milk chocolate chips for a sweeter cookie or dark chocolate chunks for a more intense flavor.
The Chunky Peanut Butter Switch
Do you love texture? Swapping creamy peanut butter for chunky is the easiest variation there is. It adds a delightful crunch and a more intense peanut flavor in every bite.
How to do it: In the classic recipe, substitute the 1 cup of creamy peanut butter with 1 cup of chunky peanut butter. No other changes are needed. It’s that simple.
A Sprinkle of Sea Salt
Salt is a flavor enhancer. A little sprinkle of flaky sea salt on top of your cookies before baking does wonders. It cuts through the sweetness and makes the peanut butter flavor pop. This small step elevates your cookie from simply good to gourmet.
How to do it: After creating the crosshatch pattern, sprinkle a tiny pinch of flaky sea salt over each cookie. Then bake as directed.
Level 2: Introducing New Flavors and Textures
Ready to get a little more adventurous? These variations introduce new ingredients that completely change the cookie’s character. They are fun, surprising, and incredibly delicious.
Peanut Butter and Jelly Cookies
Turn America’s favorite sandwich into a cookie. This variation brings a sweet, fruity element that pairs beautifully with the peanut butter. The thumbprint style makes them look as good as they taste.
How to do it: Prepare the classic cookie dough. Roll the dough into balls, but do not press them with a fork. Instead, use your thumb or the back of a small spoon to create an indentation in the center of each ball. Bake for 7 minutes.
Remove the cookies from the oven. Carefully spoon about ½ teaspoon of your favorite jam or jelly into each indentation. Strawberry or raspberry jam works wonderfully.
Return the cookies to the oven and bake for another 3-5 minutes, until the edges are golden.
Oatmeal Peanut Butter Cookies
Adding rolled oats creates a cookie with an amazing chewy texture. It makes the cookie heartier and adds a wholesome, nutty flavor of its own. This is the ultimate comfort cookie.
How to do it: Reduce the all-purpose flour in the classic recipe to 1 ½ cups. Add 1 cup of old-fashioned rolled oats (not instant oats) along with the dry ingredients. The oats will soak up moisture, resulting in a wonderfully dense and chewy cookie.
Peanut Butter Bacon Cookies
Don’t knock it until you try it! The combination of sweet and savory is irresistible. The salty, smoky flavor of bacon is a surprising but perfect complement to sweet peanut butter.
How to do it: Cook 6-8 slices of bacon until very crispy. Let it cool, then crumble it into small pieces. Fold about ½ to ¾ cup of the crumbled bacon into your finished cookie dough. The little pockets of salty crunch are a game-changer.
Spicy Peanut Butter Cookies
If you like a little heat, this variation is for you. A touch of spice adds a warm, lingering kick that makes these cookies incredibly addictive. It’s a sophisticated twist for a more adult palate.
How to do it: Add ½ teaspoon of ground cinnamon and ¼ teaspoon of cayenne pepper to your dry ingredients. The cinnamon adds warmth, while the cayenne provides a gentle heat that builds as you eat. Adjust the cayenne to your personal preference.
The Ultimate Indulgence: Stuffed and Dipped Variations
These variations are for when you want a truly show-stopping dessert. They are rich, decadent, and guaranteed to impress.
Chocolate-Stuffed Peanut Butter Cookies
Imagine breaking open a warm peanut butter cookie to find a molten river of chocolate. This is pure decadence.
How to do it: Use chocolate kisses, mini peanut butter cups, or even a small square of your favorite chocolate bar. Prepare the cookie dough as directed. Take a scoop of dough and flatten it in your palm. Place the chocolate in the center. Wrap the dough around the chocolate and roll it back into a smooth ball.
Place the balls on the baking sheet. You can still do a gentle fork press on top, but be careful not to press all the way through. Bake as directed. The surprise inside is the best part.
Caramel-Stuffed “Take 5” Inspired Cookies
Inspired by the famous candy bar, this cookie has it all. It’s sweet, salty, chewy, and crunchy.
How to do it: You will need soft caramels and small pretzels. Stuff the cookie dough with a soft caramel, just like the chocolate-stuffed version. Before baking, gently press a few small pieces of crushed pretzel onto the top of the cookie dough ball. A final sprinkle of sea salt completes the effect.
Dipped and Decorated Cookies
This is where you can let your artistic side shine. Dipping cookies in melted chocolate adds an extra layer of flavor and a beautiful, professional finish.
How to do it: Bake your peanut butter cookies (any variation!) and let them cool completely. Melt your choice of chocolate (dark, milk, or white) in a microwave-safe bowl in 30-second intervals, stirring in between.
Dip half of each cookie into the melted chocolate. Place the dipped cookies on parchment paper. Before the chocolate sets, you can add sprinkles, chopped nuts, or a drizzle of a contrasting chocolate color.
No-Bake Peanut Butter Cookie Variations
Sometimes you want a cookie without turning on the oven. No-bake cookies are quick, easy, and perfect for hot summer days. They are a staple at FastFlavorz (https://freeblitz.shop/) for their speed and flavor.
Classic No-Bake Chocolate Oatmeal Cookies
This is a beloved classic for a reason. It’s a fudgy, chewy cookie that comes together on the stovetop in minutes.
How to do it: In a saucepan, combine 2 cups of sugar, ½ cup of milk, ½ cup of butter, and ¼ cup of cocoa powder. Bring to a rolling boil and let it boil for exactly one minute.
Remove from the heat. Immediately stir in 3 cups of rolled oats, 1 cup of peanut butter, and 1 teaspoon of vanilla extract.
Work quickly to drop spoonfuls of the mixture onto parchment paper. Let them cool and set for about 30 minutes.
Peanut Butter Rice Krispie Treats
This is a simple twist on another no-bake favorite. The addition of peanut butter makes these classic treats even more delicious.
How to do it: In a large pot, melt a 10-ounce bag of marshmallows with ¼ cup of butter. Once melted, remove from the heat and stir in ½ cup of creamy peanut butter until smooth. Fold in 6 cups of Rice Krispies cereal. Press into a greased pan and let cool.
Healthy and Diet-Friendly Peanut Butter Cookies
Everyone deserves to enjoy a good peanut butter cookie. These variations cater to different dietary needs, from gluten-free to vegan to keto, without sacrificing flavor.
3-Ingredient Peanut Butter Cookies (Naturally Gluten-Free)
This recipe is almost magical. It’s hard to believe that three simple ingredients can create such a delicious cookie. It’s naturally gluten-free and can be made low-carb.
Ingredients: 1 cup peanut butter, 1 cup sugar (or a sugar substitute like erythritol), and 1 large egg.
How to do it: Mix all three ingredients together until a dough forms. Roll into balls, press with a fork, and bake at 350°F (175°C) for 10-12 minutes. That’s it!
Vegan Peanut Butter Cookies
Making a vegan version of the classic cookie is easy. You just need to substitute the butter and eggs.
How to do it: In the classic recipe, replace the 1 cup of butter with 1 cup of vegan butter or solid coconut oil. To replace the two eggs, use two “flax eggs.” To make a flax egg, mix 1 tablespoon of ground flaxseed with 3 tablespoons of water. Let it sit for 5 minutes to thicken. Use one flax egg for each regular egg in the recipe.
Keto-Friendly Peanut Butter Cookies
You can enjoy delicious peanut butter cookies while on a ketogenic diet. The key is to use a sugar-free peanut butter and a keto-friendly sweetener.
How to do it: Use the 3-ingredient recipe as a base. Ensure your peanut butter has no added sugar. Replace the 1 cup of sugar with 1 cup of a granular keto sweetener like erythritol or a monk fruit blend. These cookies are low in carbs but high in flavor.
Pro Tips for Perfect Peanut Butter Cookies Every Time
Use Room Temperature Ingredients: Softened butter and room temperature eggs mix more evenly, creating a smoother, more uniform dough.
Don’t Overmix: Mix the flour in until it’s just combined. Overmixing creates tough cookies.
Chill the Dough: If your dough feels too soft or sticky, chill it in the refrigerator for 30 minutes. Chilled dough is easier to handle and spreads less during baking, resulting in a thicker cookie.
The Fork Matters: The crosshatch pattern isn’t just for looks. It gently flattens the dense dough, helping the cookie to bake more evenly.
Know Your Oven: Every oven is different. Your cookies might bake faster or slower. Keep an eye on them the first time you make a new recipe.
Quick-Glance Guide to Peanut Butter Cookie Variations
Variation Name
Key Addition(s)
Best For…
Classic Chocolate Chip
Semi-sweet chocolate chips
The traditionalist who loves a classic combo.
Peanut Butter & Jelly
Your favorite jam or jelly
Someone looking for a fun, nostalgic, and fruity twist.
Oatmeal Peanut Butter
Old-fashioned rolled oats
Those who love a hearty, chewy, and wholesome cookie.
Peanut Butter Bacon
Crispy, crumbled bacon
The adventurous eater who loves sweet and savory.
Spicy Peanut Butter
Cinnamon and cayenne pepper
A sophisticated palate that enjoys a little warmth and heat.
Chocolate-Stuffed
Chocolate kisses or squares
The ultimate chocolate lover seeking a decadent surprise.
3-Ingredient (GF)
Peanut butter, sugar, egg
A quick, easy, and gluten-free cookie experience.
No-Bake Fudge
Cocoa powder, oats
A fast and fudgy treat without using the oven.
“Baking is about more than following a recipe. It’s about taking something you love and making it your own. Don’t be afraid to play with your food.”
The world of peanut butter cookies is vast and delicious. From a simple sprinkle of sea salt to a decadent caramel-stuffed creation, there is a variation for every mood and every person.
We encourage you to use this guide as a starting point. Mix and match these ideas. What about a spicy peanut butter cookie with dark chocolate chips? Or an oatmeal cookie stuffed with a peanut butter cup? The possibilities are truly endless.
Baking should be fun. It’s a chance to be creative in the kitchen and share something wonderful with the people you care about. So preheat your oven, grab your peanut butter, and start your next cookie adventure.
Frequently Asked Questions (FAQs)
Q1: Why are my peanut butter cookies dry and crumbly? A1: This is usually caused by one of two things: too much flour or overbaking. Be sure to measure your flour correctly (spoon it into the measuring cup and level it off). Also, pull the cookies from the oven when the edges are set but the centers still look a little soft.
Q2: Can I use natural peanut butter? A2: Yes, but it can change the texture. Natural peanut butter is often runnier and can cause cookies to spread more. If you use it, you may need to chill your dough for about an hour before baking to help them hold their shape.
Q3: How do I store peanut butter cookies? A3: Store them in an airtight container at room temperature. They will stay fresh for up to a week. For extra softness, you can add a slice of bread to the container; the cookies will absorb its moisture.
Q4: Can I freeze peanut butter cookie dough? A4: Absolutely! Roll the dough into balls, place them on a baking sheet, and freeze until solid. Then, transfer the frozen balls to a freezer bag. You can bake them directly from frozen; just add 2-3 extra minutes to the baking time.
Q5: Why didn’t my no-bake cookies set properly? A5: For no-bake cookies, the most critical step is boiling the sugar mixture for exactly one full minute. Boiling for too little time means it won’t set. Boiling for too long can make the cookies dry and crumbly. Use a timer
The holiday season arrives with a magical scent. It’s the crisp chill in the air mixed with pine, cinnamon, and the sweet aroma of baking. Nothing says “Christmas” quite like a kitchen filled with the warmth of an oven and the promise of delicious treats. Christmas cookies are more than just a dessert. They are a tradition, a creative outlet, and a way to share love.
This guide is your ultimate holiday special. We will dive deep into the world of classic Christmas cookies. We’ll explore exciting new recipes that go beyond the expected. We will also share essential baking tips to guarantee your success. You’ll find everything you need to make this holiday season your most delicious one yet. Whether you are a seasoned baker or a curious beginner, there is something here for you.
Let’s preheat our ovens and get ready to create some holiday magic. The journey from simple ingredients to delightful desserts is a rewarding one. Join us at FastFlavorz as we bake our way through the most wonderful time of the year.
The Heart of the Holidays: Classic Christmas Cookies
Every family has its favorites. These are the tried-and-true recipes passed down through generations. They are the cookies that instantly bring back memories of childhood holidays. Mastering these classics is a rite of passage for any holiday baker.
The Timeless Sugar Cookie
Sugar cookies are the perfect canvas for holiday creativity. They are simple, versatile, and endlessly fun to decorate. Their buttery flavor and crisp edges make them a universal favorite.
Why They Are Essential: The real magic of sugar cookies is in the decorating. Gather your family, lay out the icing and sprinkles, and let everyone’s inner artist shine. It’s an activity that creates both delicious treats and lasting memories.
Simple Sugar Cookie Recipe: This recipe focuses on a dough that holds its shape, making it perfect for cookie cutters.
Ingredients:
1 cup unsalted butter, softened
1 cup granulated sugar
1 large egg
1 tsp vanilla extract
3 cups all-purpose flour
1/2 tsp baking powder
1/4 tsp salt
Instructions:
In a large bowl, cream the softened butter and sugar until light and fluffy.
Beat in the egg and vanilla extract.
In a separate bowl, whisk together the flour, baking powder, and salt.
Gradually add the dry ingredients to the wet ingredients, mixing until just combined.
Divide the dough in half, wrap in plastic, and chill for at least 1 hour.
Preheat your oven to 350°F (175°C).
On a floured surface, roll out the dough to 1/4-inch thickness.
Cut out shapes with your favorite cookie cutters.
Place on a baking sheet lined with parchment paper.
Bake for 8-10 minutes, or until the edges are lightly golden.
Let cool completely before decorating.
The Iconic Gingerbread Man
Is it even Christmas without a gingerbread man? The spicy, warm flavor of ginger, cinnamon, and molasses is the essence of the holidays. These cookies are firm enough to build houses with but soft enough to be a delightful treat.
A Spice-Lover’s Dream: The key to great gingerbread is the balance of spices. Don’t be afraid of the molasses; its rich, dark flavor is what gives these cookies their signature taste and color.
Classic Gingerbread Cookie Recipe:
Ingredients:
1/2 cup unsalted butter, softened
1/2 cup brown sugar, packed
1/2 cup molasses
1 large egg
3 cups all-purpose flour
1 tsp baking soda
2 tsp ground ginger
1 tsp ground cinnamon
1/2 tsp ground cloves
1/4 tsp salt
Instructions:
Cream the butter and brown sugar together.
Beat in the molasses and egg until well combined.
In another bowl, whisk the flour, baking soda, spices, and salt.
Slowly mix the dry ingredients into the wet mixture.
The dough will be sticky. Divide it, wrap it, and chill for at least 2 hours.
Preheat your oven to 350°F (175°C).
Roll the chilled dough on a lightly floured surface.
Cut out your gingerbread shapes and place them on a prepared baking sheet.
Bake for 9-11 minutes. The cookies should be firm to the touch.
Cool on the pan for a few minutes before transferring to a wire rack.
Peanut Butter Blossoms
This cookie is a masterpiece of flavor and texture. A soft, chewy peanut butter cookie is crowned with a milk chocolate kiss. The combination of salty and sweet is simply irresistible. They are incredibly easy to make and always disappear fast.
The Perfect Combination: The trick to a perfect blossom is to press the chocolate into the cookie as soon as it comes out of the oven. The heat from the cookie will soften the chocolate just enough to make it melt in your mouth.
Easy Peanut Butter Blossom Recipe:
Ingredients:
1/2 cup unsalted butter, softened
1/2 cup creamy peanut butter
1/2 cup granulated sugar
1/2 cup brown sugar, packed
1 large egg
1 tsp vanilla extract
1 3/4 cups all-purpose flour
1 tsp baking soda
Extra granulated sugar for rolling
Approx. 36 milk chocolate kisses, unwrapped
Instructions:
Preheat your oven to 375°F (190°C).
Cream the butter, peanut butter, and both sugars together.
Beat in the egg and vanilla.
In a separate bowl, combine the flour and baking soda.
Add the dry ingredients to the wet ingredients and mix until a dough forms.
Shape the dough into 1-inch balls.
Roll each ball in the extra granulated sugar.
Place on an ungreased baking sheet.
Bake for 8-10 minutes. The cookies will look puffy.
Immediately press one chocolate kiss into the center of each hot cookie.
Allow to cool completely on the baking sheet.
Beyond the Classics: Unique Holiday Cookie Ideas
Tradition is wonderful, but sometimes you want to surprise your guests with something new. These recipes add a modern twist or a global flavor to your holiday cookie platter. They are unique, delicious, and guaranteed to start a conversation.
“Baking is about creativity. It’s about taking simple ingredients and transforming them into something that brings joy to people’s lives.”
Italian Pizzelle: A Delicate Wafer Delight
Pizzelle are not your typical cookie. These thin, crisp, waffle-like treats are made with a special pizzelle iron. They are flavored with anise, vanilla, or lemon, offering a light and elegant alternative to heavier cookies.
A Touch of Elegance: Pizzelle are stunning on their own, but you can also shape them while they are still warm. Roll them into cones for cannoli-style fillings or drape them over an inverted bowl to create a small edible dish for fruit or ice cream.
Anise Pizzelle Recipe:
Ingredients:
3 large eggs
3/4 cup granulated sugar
1/2 cup unsalted butter, melted and cooled
1 tsp anise extract (or vanilla)
1 3/4 cups all-purpose flour
2 tsp baking powder
Instructions:
Preheat your pizzelle iron according to the manufacturer’s instructions.
In a medium bowl, beat the eggs and sugar until pale yellow.
Stir in the melted butter and anise extract.
In another bowl, whisk the flour and baking powder together.
Gradually add the dry ingredients to the egg mixture, stirring until smooth.
Drop a rounded tablespoon of batter onto each grid of the hot iron.
Close the lid and cook for 30-60 seconds, or until lightly golden.
Carefully remove the pizzelle with a fork and let it cool on a flat surface. They will crisp as they cool.
Cranberry Orange Shortbread: A Zesty Twist
Shortbread is a buttery Scottish classic. This version adds the festive flavors of tart cranberries and bright orange zest. The result is a cookie that is both rich and refreshing. The beautiful red specks of cranberry make them visually stunning.
Flavor that Pops: Using fresh orange zest is non-negotiable for this recipe. It provides an aromatic oil that dried zest simply cannot match. The combination of citrus and cranberry cuts through the richness of the butter perfectly.
Festive Shortbread Recipe:
Ingredients:
1 cup unsalted butter, softened
1/2 cup powdered sugar
Zest of 1 large orange
2 cups all-purpose flour
1/2 cup dried cranberries, finely chopped
Instructions:
In a bowl, beat the softened butter until creamy.
Add the powdered sugar and orange zest, and beat until smooth.
Gradually mix in the flour until the dough starts to come together.
Stir in the finely chopped dried cranberries.
Form the dough into a log, about 2 inches in diameter.
Wrap the log in plastic wrap and chill for at least 1 hour.
Preheat the oven to 325°F (165°C).
Slice the chilled log into 1/4-inch thick rounds.
Place the slices on a baking sheet lined with parchment paper.
Bake for 12-15 minutes, until the edges are just beginning to turn golden.
Let them cool on the baking sheet for a few minutes before moving to a wire rack.
Your Guide to Perfect Holiday Baking Every Time
Even the best recipes can fail if the technique is wrong. Holiday baking can be stressful, but these tips will help you navigate the kitchen like a pro. Following these simple rules will dramatically improve the quality of your cookies and cakes.
The Importance of Room Temperature Ingredients
Many recipes call for room temperature butter and eggs. This is not a suggestion; it’s a crucial step.
Why it Matters: Softened butter traps air when creamed with sugar. This air expands in the oven, creating a light, tender, and fluffy texture. Cold butter cannot do this. Similarly, room temperature eggs mix more evenly into the batter, creating a stable emulsion.
Quick Tip: To bring eggs to room temperature quickly, place them in a bowl of warm (not hot) water for 5-10 minutes. To soften butter, cut it into small cubes and let it sit on the counter for about 20-30 minutes.
Measuring Flour Correctly: The Spoon and Level Method
How you measure flour can make or break your baked goods. Scooping flour directly from the bag with your measuring cup compacts it. This can lead to you using up to 25% more flour than the recipe calls for. The result? Dry, dense, and tough cookies.
The Right Way: Use a spoon to fluff up the flour in its container. Then, spoon the flour into your measuring cup until it is overflowing. Use the back of a knife to level off the top. This method ensures a light, accurate measurement every time.
Don’t Overmix Your Dough
Once you add flour to your wet ingredients, gluten starts to develop. A little gluten is good; it provides structure. Too much gluten, however, is the enemy of tender cookies.
The Rule: Mix the dry ingredients in only until they are just combined. A few streaks of flour are okay. Overmixing will make your cookies tough and hard instead of soft and chewy. This is especially important for sugar cookies and shortbread.
Baking Emergency? A Handy Substitution Table
It’s late at night, and you realize you are out of a key ingredient. Don’t panic! This table provides some common substitutions that can save your holiday baking.
Note: Substitutions can sometimes alter the final texture and flavor slightly, but they work great in a pinch.
Beyond the Cookie Jar: Unforgettable Holiday Desserts
While cookies may be the star, the holiday dessert table has room for other showstoppers. These recipes go “beyond” the cookie jar to offer something truly special for your festive gatherings. They are perfect for Christmas dinner or any holiday party.
“The sharing of food is the basis of community. It is a gesture of hospitality and friendship, a way of creating connection.”
For more quick and delicious ideas like these, be sure to explore all the recipes here on FastFlavorz (https://freeblitz.shop/)!
Classic Peppermint Bark
This no-bake treat is one of the easiest and most impressive holiday desserts. It requires only a few ingredients and looks incredibly festive. The snap of the chocolate combined with the crunch of peppermint candy is pure holiday joy.
A Simple Stunner: The key to great peppermint bark is using good quality chocolate. It will melt more smoothly and have a much better flavor.
Ingredients:
12 ounces semisweet or dark chocolate, chopped
12 ounces white chocolate, chopped
1/2 tsp peppermint extract
1/2 cup crushed peppermint candies or candy canes
Instructions:
Line a baking sheet with parchment paper.
Melt the semisweet chocolate in a microwave-safe bowl in 30-second intervals, stirring in between.
Spread the melted dark chocolate evenly over the prepared baking sheet.
Let it set in the refrigerator for about 20 minutes, or until firm.
Melt the white chocolate in the same way. Stir in the peppermint extract.
Quickly spread the melted white chocolate over the set dark chocolate layer.
Immediately sprinkle the crushed peppermint candies over the top.
Let the bark set completely at room temperature or in the fridge.
Once firm, break it into large, irregular pieces.
Holiday Spiced Bundt Cake with Cream Cheese Glaze
A beautiful Bundt cake can be the centerpiece of your dessert table. This one is packed with warm holiday spices and is surprisingly easy to make. The tangy cream cheese glaze cuts through the sweetness and adds a touch of elegance.
The Showstopper: Make sure to grease and flour your Bundt pan thoroughly. Get into every nook and cranny to ensure the cake releases cleanly and shows off its beautiful design.
Ingredients for the Cake:
3 cups all-purpose flour
2 tsp baking powder
1/2 tsp baking soda
2 tsp ground cinnamon
1 tsp ground ginger
1/2 tsp ground nutmeg
1/2 tsp salt
1 cup unsalted butter, softened
2 cups granulated sugar
4 large eggs
1 cup sour cream
Ingredients for the Glaze:
4 oz cream cheese, softened
1 1/2 cups powdered sugar
2-3 tbsp milk
1/2 tsp vanilla extract
Instructions:
Preheat your oven to 350°F (175°C). Thoroughly grease and flour a 10-cup Bundt pan.
In a bowl, whisk together the flour, baking powder, baking soda, spices, and salt.
In a separate large bowl, cream the butter and sugar until fluffy.
Add the eggs one at a time, beating well after each addition.
Alternate adding the flour mixture and the sour cream, beginning and ending with the flour. Mix until just combined.
Spoon the batter into the prepared Bundt pan and smooth the top.
Bake for 50-60 minutes, or until a toothpick inserted into the center comes out clean.
Let the cake cool in the pan for 15 minutes before inverting it onto a wire rack to cool completely.
To make the glaze, beat the cream cheese until smooth. Add the powdered sugar, milk, and vanilla, and beat until you have a pourable consistency.
Drizzle the glaze over the cooled cake.
Conclusion: Baking Memories for the Holidays
Baking during the holidays is about so much more than just the final product. It’s about the process. It’s about filling your home with wonderful smells. It’s about creating something with your hands to share with the people you love. It’s about building traditions and making memories that will last a lifetime.
Whether you stick to the timeless sugar cookie or venture out to make a festive Bundt cake, the most important ingredient is love. We hope this guide inspires you to preheat your oven, get out your mixing bowls, and bake something special this season.
From all of us at FastFlavorz, we wish you a holiday season filled with warmth, joy, and delicious treats. Happy baking!
Holiday Baking FAQs
Q1: How do I store my Christmas cookies to keep them fresh? A1: Store soft cookies in an airtight container with a slice of bread to maintain moisture. Store crisp cookies in a container with a looser lid to prevent them from getting soft.
Q2: Can I freeze my cookie dough? A2: Yes! Most cookie doughs freeze beautifully. For drop cookies, scoop balls onto a baking sheet, freeze until solid, then transfer to a freezer bag. For cutout cookies, freeze the dough in a flat disk. It can be stored for up to 3 months.
Q3: Why are my cookies spreading out and becoming too thin? A3: This is usually caused by butter that is too soft or melted. Chilling your dough before baking is the best way to prevent excessive spreading. Also, ensure your oven is fully preheated.
Q4: How do I get my royal icing to the right consistency for decorating? A4: For outlining, you want a thicker, toothpaste-like consistency. For flooding (filling in the outline), thin the icing with a tiny bit of water at a time until it has the consistency of honey.
Q5: Can I prepare any of these desserts ahead of time? A5: Absolutely. Most cookies can be baked and stored for several days. The Bundt cake can be made a day or two in advance. The peppermint bark can be made up to a week ahead and stored in a cool, dry place.
Today, we are diving into a world of pure, unadulterated joy. We are talking about cookie dough. That magical substance is often more tempting than the final baked cookie. It’s a symbol of comfort, a nostalgic treat, and a versatile ingredient waiting to be explored.
Most of us have snuck a spoonful of raw dough from the mixing bowl. We know the risks, but the temptation is too strong. What if you could enjoy that same deliciousness without any worry? And what if you could use that safe, edible dough in ways you’ve never imagined?
This ultimate guide will take you on a journey. We will start with the perfect, safe-to-eat cookie dough base. Then, we’ll explore a universe of creative ideas. We have no-bake treats, innovative baked goods, and even decadent crumbles. Get ready to transform your love for cookie dough into a culinary adventure.
The Foundation: Perfect and Safe Edible Cookie Dough
Before we get creative, we must address safety. Traditional cookie dough contains two ingredients that are risky to eat raw: raw eggs and uncooked flour. Raw eggs can carry salmonella. Uncooked flour can harbor E. coli and other harmful bacteria.
Don’t worry. Creating a 100% safe and delicious edible cookie dough is incredibly simple. You just need to make two small adjustments.
Why You Need a Special Edible Recipe
You might be tempted to use your regular cookie recipe. Just leave out the eggs. But the flour is still a problem. To be truly safe, you must use a recipe designed to be eaten raw. It ensures the best taste, texture, and peace of mind. Our goal is to create a dough that is creamy, flavorful, and perfect for snacking or using in other recipes.
“Happiness is a spoonful of safe, edible cookie dough.”
The Golden Rule: Heat-Treat Your Flour
This step is non-negotiable for safety. Heat-treating your flour kills any potential bacteria, making it completely safe to consume. It only takes a few minutes and is worth the effort.
How to Heat-Treat Flour:
Oven Method: Spread your all-purpose flour on a baking sheet. Bake it at 350°F (175°C) for about 5-7 minutes. The flour is ready when a thermometer reads 165°F (74°C). Let it cool completely before using.
Microwave Method: Place the flour in a microwave-safe bowl. Heat it on high in 30-second intervals. Stir between each interval to prevent burning. Continue until the flour reaches 165°F (74°C). This usually takes 90 seconds to 2 minutes in total.
Once cooled, sift the flour to remove any clumps. Now you have safe, ready-to-use flour.
The Egg-Free Advantage
Leaving out the eggs is the second key to safe dough. We will compensate for the moisture and binding properties of eggs with milk or cream. This also makes the dough extra rich and creamy.
Basic Edible Chocolate Chip Cookie Dough Recipe
This recipe is your starting block. It’s the versatile base for almost every idea in this article.
Ingredients:
1 cup (130g) heat-treated all-purpose flour
1/2 cup (113g) unsalted butter, softened
1/2 cup (100g) packed brown sugar
1/4 cup (50g) granulated sugar
2 tablespoons milk or heavy cream
1 teaspoon vanilla extract
1/4 teaspoon salt
1 cup (170g) mini chocolate chips
Instructions:
In a large bowl, cream together the softened butter, brown sugar, and granulated sugar until light and fluffy.
Add the vanilla extract and milk. Mix until just combined.
Gradually add the heat-treated flour and salt. Mix on low speed until a soft dough forms.
Gently fold in the mini chocolate chips with a spatula.
Your edible cookie dough is ready to eat or use in other creations!
Now for the fun part. These ideas require no oven and deliver maximum flavor in minimal time. They are perfect for hot days, quick snacks, or party treats.
Cookie Dough Bites (Truffles)
These are poppable, addictive, and incredibly easy to make. They are the quintessential no-bake cookie dough treat.
How to Make Them:
Prepare your edible cookie dough.
Use a small cookie scoop or a spoon to form 1-inch balls.
Roll them between your palms until smooth.
Place the balls on a parchment-lined baking sheet.
Chill in the refrigerator for at least 30 minutes to firm up.
(Optional) Melt chocolate or candy melts. Dip each chilled dough ball into the melted chocolate. Let the excess drip off.
Place back on the parchment paper and let the coating set. You can add sprinkles before the chocolate hardens.
Cookie Dough Dessert Dip
Imagine a fluffy, creamy dip that tastes exactly like cookie dough. Serve it with pretzels, graham crackers, or fruit for the ultimate party snack.
How to Make It:
Prepare your edible cookie dough base, but use a little extra milk (about 3-4 tablespoons total) to make it creamier.
For an even fluffier texture, you can beat in 4 ounces of softened cream cheese with the butter and sugar.
Serve in a bowl, topped with extra mini chocolate chips.
Dippers: Pretzels, apple slices, strawberries, vanilla wafers, or graham crackers.
Cookie Dough Stuffed Strawberries
This elegant treat is surprisingly simple. The combination of fresh, juicy strawberry and rich cookie dough is a match made in heaven.
How to Make Them:
Wash and dry large strawberries.
Use a small knife or a huller to remove the stem and scoop out a small cavity in each strawberry.
Carefully fill each strawberry with your edible cookie dough.
Arrange on a platter and serve immediately. They are best enjoyed fresh.
Cookie Dough Ice Cream Sandwiches
Upgrade store-bought or homemade ice cream with this simple trick. It’s a customizable dessert that everyone will love.
How to Make Them:
Line an 8×8 inch pan with parchment paper.
Press half of your edible cookie dough recipe into an even layer at the bottom of the pan.
Slightly soften your favorite ice cream (vanilla, chocolate, or even coffee flavor works great).
Spread the softened ice cream evenly over the cookie dough layer.
Freeze for about 1-2 hours, or until the ice cream is firm.
Press the remaining cookie dough on top of the ice cream layer.
Cover and freeze for another 4 hours, or until completely solid.
Lift the block out of the pan using the parchment paper. Cut into squares or rectangles and serve.
Baked, But Not Just Cookies
Cookie dough is fantastic raw, but its potential in the oven extends far beyond a simple cookie. These recipes use cookie dough as a secret ingredient for unbelievably delicious baked goods.
“The only thing better than a brownie is a brownie with a cookie dough heart.”
The “Brookie”: Cookie Dough Brownies
Why choose between a cookie and a brownie when you can have both? A brookie is the ultimate dessert hybrid. It features a fudgy brownie base with a layer of chewy chocolate chip cookie on top.
How to Make It:
Prepare a batch of your favorite brownie batter (from a box or scratch).
Prepare a batch of bake-able cookie dough (use a standard recipe with eggs and regular flour for this).
Grease and line a baking pan.
Spread the brownie batter evenly in the bottom of the pan.
Drop spoonfuls of the cookie dough over the brownie batter. You can also gently press small, flattened discs of dough on top.
Bake according to the brownie recipe instructions, adding 5-10 minutes to the baking time to ensure the cookie layer is cooked.
Let it cool completely before slicing.
Cookie Dough Stuffed Cupcakes
This is a delightful surprise hiding inside a simple cupcake. Biting into a fluffy cupcake to find a gooey, melted cookie dough center is pure bliss.
How to Make It:
Prepare your favorite vanilla or chocolate cupcake batter.
Prepare a bake-able cookie dough. Roll it into small 1-inch balls.
Fill your cupcake liners about halfway with cupcake batter.
Place one cookie dough ball in the center of each cupcake.
Top with a little more batter, covering the cookie dough ball completely.
Bake according to the cupcake recipe. The cookie dough will melt into a perfect, gooey center.
Frost and decorate as desired.
Skillet Cookie (Pizookie)
A giant, warm, gooey cookie baked in a cast-iron skillet is the definition of a show-stopping dessert. It’s meant for sharing and is best served warm with a scoop of ice cream.
How to Make It:
Preheat your oven to 350°F (175°C).
Grease a 10-inch cast-iron skillet with butter.
Press a full batch of bake-able cookie dough into the skillet, spreading it evenly.
Bake for 20-25 minutes, or until the edges are golden brown and the center is slightly soft.
Let it cool for a few minutes in the skillet.
Serve warm, directly from the skillet. Top with scoops of vanilla ice cream and a drizzle of chocolate or caramel sauce.
The Crumble Revolution: From Dough to Dust
The final frontier of cookie dough creativity is the crumble. This is where you take baked cookie dough and transform it into a crunchy, versatile topping for almost anything.
How to Make Cookie Dough Crumble
The process is simple. You bake the dough and then break it.
Prepare a batch of bake-able cookie dough.
Spread the dough thinly on a parchment-lined baking sheet. It doesn’t have to be perfect.
Bake at 350°F (175°C) for 12-15 minutes, or until it’s golden brown and cooked through.
Let the giant cookie cool completely.
Once cool, break it into pieces of various sizes. You can do this by hand for larger chunks or put it in a bag and crush it with a rolling pin for a finer crumble.
Creative Uses for Cookie Dough Crumble
This crunchy, buttery crumble can elevate so many simple dishes.
Ice Cream Topping: Forget sprinkles. This is the ultimate topping for a bowl of ice cream.
Yogurt Parfait Layer: Add a crunchy layer to your morning yogurt. Alternate layers of yogurt, fruit, and cookie dough crumble for a decadent breakfast or snack.
Cheesecake Crust or Topping: Use the finer crumble as a press-in crust for a no-bake cheesecake. Or, sprinkle larger pieces on top for texture.
Fruit Crumble with a Twist: Make your favorite apple or berry crumble. Instead of a traditional oat topping, use your cookie dough crumble. Since it’s already baked, just sprinkle it on top of the fruit during the last 10 minutes of baking to warm it through.
Flavor Variations: Customize Your Dough
The classic chocolate chip is just the beginning. Your edible cookie dough base is a blank canvas. Use this table to inspire your next creation.
Base Dough Idea
Primary Mix-ins
Secondary Mix-ins / Spices
Flavor Profile
Birthday Cake
Rainbow sprinkles
White chocolate chips, almond extract
Sweet, festive, and cake-like.
Peanut Butter
Peanut butter chips, chopped peanuts
Use half butter, half peanut butter
Rich, nutty, and savory-sweet.
Oatmeal Raisin
Rolled oats, raisins
Cinnamon, nutmeg
Chewy, spiced, and wholesome.
Double Chocolate
Cocoa powder (in the dough)
Dark chocolate chunks, white chocolate chips
Deep, rich, and intensely chocolatey.
S’mores
Mini marshmallows, crushed graham crackers
Milk chocolate chips
Toasty, gooey, and reminiscent of a campfire.
Salted Caramel
Caramel bits or chopped soft caramels
A sprinkle of flaky sea salt on top
Sweet, salty, and luxuriously decadent.
To create these variations, simply start with the basic edible cookie dough recipe.
For Birthday Cake: Omit the brown sugar and use all granulated sugar. Add 1/2 teaspoon of almond extract and fold in 1/2 cup of rainbow sprinkles and 1/2 cup of white chocolate chips.
For Peanut Butter: Replace half of the butter with creamy peanut butter. Use peanut butter chips instead of chocolate chips.
For Double Chocolate: Add 1/4 cup of unsweetened cocoa powder along with the flour. Use a mix of dark and white chocolate chips.
Tips for Perfect Cookie Dough Every Time
Follow these simple tips to ensure your cookie dough adventures are always successful.
Use Softened, Not Melted Butter: Softened butter creams properly with sugar, creating a light, fluffy texture. Melted butter will result in a greasy, dense dough.
Don’t Overmix the Flour: Once you add the flour, mix only until it’s just combined. Overmixing develops the gluten, which can make your dough tough.
Chill Your Dough: For recipes like cookie dough bites or ice cream sandwiches, chilling is key. It helps the dough firm up, making it easier to handle and preventing it from becoming a sticky mess.
Quality Ingredients Matter: Using good quality vanilla extract, butter, and chocolate will make a noticeable difference in the final flavor.
Storage is Simple: Store your edible cookie dough in an airtight container in the refrigerator for up to one week. You can also freeze it for up to 3 months. Roll it into a log and wrap it in plastic wrap, or freeze individual portions for a quick treat.
Conclusion: Unleash Your Dough-magination
Cookie dough is so much more than a pre-cookie stage. It is a versatile, exciting, and delicious ingredient in its own right. From a simple, safe-to-eat spoonful to elaborate layered desserts, the possibilities are endless.
We started with the essential safe-to-eat recipe. We explored instant no-bake treats like truffles and dips. We ventured into the oven with brookies and stuffed cupcakes. Finally, we deconstructed it all into a revolutionary crumble topping.
The next time you have a craving for cookie dough, we encourage you to think outside the box. Use these ideas from FastFlavorz (https://freeblitz.shop/) as your launching point. Experiment with flavors, mix-ins, and techniques. Share your creations with friends and family. Most importantly, have fun with it. After all, life is short. Eat the cookie dough.
Frequently Asked Questions (FAQs)
Q1: Can I use store-bought cookie dough for these no-bake ideas? A: No. Store-bought refrigerated dough contains raw eggs and untreated flour. It is not safe to eat raw. Only use a recipe specifically designed to be edible and egg-free.
Q2: How long does homemade edible cookie dough last? A: It can be stored in an airtight container in the refrigerator for up to one week. For longer storage, you can freeze it for up to three months.
Q3: How can I make this gluten-free? A: Easily! Just substitute the all-purpose flour with a quality 1-to-1 gluten-free baking flour blend. Remember to heat-treat the gluten-free flour as well for safety.
Q4: My edible dough is too crumbly or too sticky. What did I do wrong? A: If it’s too crumbly, it likely needs a bit more moisture. Add milk or cream one teaspoon at a time until it comes together. If it’s too sticky, it may need more flour. Add heat-treated flour one tablespoon at a time.
Q5: Can I bake the edible cookie dough recipe? A: It is not recommended. The recipe lacks eggs and leavening agents (like baking soda), so the “cookies” will not rise or spread properly. They will likely melt into flat, greasy discs. Use a standard cookie recipe for baking.